Tuesday, April 30, 2013

Adrenalize Me Tut...

Supplies Used:
Maria Brink tube by Hunter Cazador. The tube is exclusive at Tagger's Den.
Adrenalize kit & Template from Manipulated By Magik. This is an upcoming kit so be sure to watch her blog HERE for it's release.
Eyecandy 4000 Gradient Glow (Font Only)
Font: Anha Queen VMF

Open up the template in the kit.
Working from the bottom up....
Dropshadow Dotted Circles.
Dropshadow Top Left Circle.
Dropshadow Top Right Circle.
Select the Large circle layer.
Selections, Select all, Float.
C/P Paper 11.
Resize by 75%.
Selections, Invert.
Hit delete on the paper layer.
Deselect.
Dropshadow paper layer.
Delete or hide large circle layer.
Dropshadow rectangle layer.
Select Middle diamond layer.
Selections, Select all, Float.
C/P Paper 3.
Selections, Invert.
Hit delete on the paper layer.
Delete or hide the original middle diamond layer.
Dropshadow middle diamond frame.
Select Left Diamond layer.
Selections, Select all, Float.
Add a new raster layer.
C/P Paper 15 into selection.
Deselect.
Delete or hide the original Left Diamond layer.
Select Right Diamond layer.
Selections, Select all, Float.
Add a new raster layer.
C/P Paper 15 into selection.
Deselect.
Delete or hide the original Right Diamond layer. 
Dropshadow Left Diamond frame layer.
Dropshadow Right Diamond frame layer.
Dropshadow star layer.
C/P your tube.
Dropshadow.
Position under the word art.
Click on the Word Art 2 layer.
C/P Polaroids. 
Resize by 50%. Dropshadow.
Position near the bottom right of the template.
Using your lasso tool select around the Black part of the frame.
C/P your tube.
Position as desired inside the selection.
Selections, Invert, Delete.
Deselect.
Change the layer property to Luminance (L).
C/P Corset.
Resize by 75%. Dropshadow.
Using your deform tool position under the right side of the Polaroids.
C/P Roses. 
Dropshadow.
Position over the left side of the corset.
C/P Drugs.
Resize by 50%. Dropshadow.
Position over the left side of the polaroids.
C/P Syringe 2.
Resize by 50%. Dropshadow.
Duplicate Syringe.
Use your deform tool to position syringes over the right side of the drugs.
C/P Hat.
Resize by 50%. Dropshadow.
Position over the bottom right of the polaroids.
C/P Pills.
Resize by 50%. Dropshadow.
Position over the bottom of the drugs bottle.
C/P Cuffs.
Image, Flip.
Resize by 50%. Dropshadow.
Position under the pill bottle.
Select the top layer in your layer palette.
Using your preset shape tool draw out a circle the same size as the large circle.
Click the font tool and set to floating.
Hover your cursor over the top of the circle.
Type out your font.
Promote selection to layer.
Deselect.
Apply inner bevel.
Add Black Gradient Glow of 3.
Dropshadow.
Delete the circle layer.
Don't forget your copyright & Watermark.


Simple Serenity tut...

Supplies Used:
Peacefully Dreaming tube by Zindy. Get it HERE.
Katy Love kit by Bibi's Collection. Get it at SATC.
Font: Summertime

Open a new image size 500 by 500.
C/P Element 26.
Resize by 50%. Dropshadow.
C/P Element 25.
Resize by 50%. 
Duplicate a few times and position at the bottom of the water.
C/P Element 83.
Resize by 40%. Dropshadow.
Position over the left side of the background.
C/P Element 50.
Resize by 50%.
Position under the top right of the tree.
C/P Element 69.
Resiz eby 40%. Dropshadow.
Position over the top of the tree & Sun.
C/P Element 51.
Resize by 40%. Dropshadow.
Position over the right side of the background.
C/P Element 68.
Image, Mirror.
Resize by 40%. Dropshadow.
Position over the pink grass.
C/P Element 78.
Resize by 60%. Dropshadow.
Position over the grasses on the right side.
C/P your tube.
Dropshadow.
Position where your water & "sand" layers meet.
Type out your font & covert to raster layer.
Selections, Select all, Float.
Promote selections to layer.
Hit Delete on your keyboard.
Apply inner bevel of choice & Dropshadow.
Deselect.
Delete the original font layer.
Don't forget your copyright & Watermark.


Monday, April 29, 2013

Rock It Out tut...

Supplies Used:
Taffy Tube by Spazz. Get it at SATC.
Roxy Rocks kit from Bibi's Collection. Get it at SATC.
Alisha & Crys Collab 2 template from Creative Misfits.
Eyecandy 4000 Gradient Glow & HSB Noise
Font: Society Editor
 
Open up the template.
Delete the copyright layer.
Since this is a template tag I am gonna start at the bottom and work my way up.
Select the background layer.
C/P Element 55.
 Resize by 145%. Dropshadow.
Select Bar 4.
Apply Eyecandy 4000 HSB Noise with the following settings....
Hue 25, Saturation 30, Brightness 40, Opacity variation 0, Lump Width 10.08, Lump Height 10.08, Smooth Lumps, Seamless tile checked. 
Dropshadow.
Select bar 3.
Repeat HSB Noise & Drop Shadow. 
Select bar 2.
Repeat HSB Noise & Drop Shadow. 
Select bar 2.
Repeat HSB Noise & Drop Shadow. 
Select the Rectangle layer.
Selections, Select all.
C/P Paper 3.
 Resize by 75%.
Selections, Invert, Delete.
Deselect.
Apply inner bevel with these settings to the paper layer...
Bevel 2, Width 5, Smoothness 40, Depth 10, Ambiance 10, Shininess 30, Color White, Angle 200, Intensity 30, Elevation 60.
Dropshadow Paper layer.
Delete or hide the rectangle layer.
Select Half Circle 1.
Adjust, Color balance, Manual Color correct.
Set the source to the color of the circle, Target to black.
Adjust, Add Remove Noise. 
Add Noise  Random, 75, Monochrome unchecked.
Apply inner bevel and drop shadow.
Select Half Circle 2.
Adjust, Color balance, Manual Color correct.
Set the source to the color of the circle, Target to black.
Adjust, Add Remove Noise. 
Add Noise  Random, 75, Monochrome unchecked.
Apply inner bevel and drop shadow.
Select the frame layer.
Adjust, Color Balance, Negative Image.
Add Noise  Random, 75, Monochrome unchecked.
Select the inside of the frame using your magic wand.
Selections, Modify, Expand by 3.
Open Paper 10.
Using your magic wand select the white part of the paper.
Adjust, Color Balance, Manual color correct.
Set the source to white, Target to black.
Deselect.
C/P Paper under the frame layer.
Selections, Invert, Delete.
Deselect.
C/P Element 57.
 Image, Flip.
Resize by 50%.
Adjust, Color Correct, Manual Color correct.
Set the source to black, Target to a color from your tube.
Dropshadow.
Position over the left side of the frame.
C/P Element 61.
Resize by 50%. Dropshadow.
Position over the bottom left side of the frame.
Dropshadow Note 5.
Dropshadow Note 4.
 Dropshadow Note 3.
 Dropshadow Note 2.
 Dropshadow Note 1.
C/P your tube.
Dropshadow.
Position over the left side of the template.
Select Word Art.
Apply Fat Gradient Glow of 3...Tab 2 should look like this....
Dropshadow Word Art.
Repeat Fat Gradient Glow & Dropshadow on Word Art 3.
Select Word Art 2.
Apply Gradient Glow of 3 in a color complimentary to your tube.
Dropshadow.
Select Word Art 4.
Repeat Gradient Glow & Dropshadow.
C/P Element 59.
Resize by 50%. Dropshadow.
Position over the left side of the frame.
C/P Element 41.
Resize by 50%. Dropshadow.
Position to the left of the speaker. (If necessary use your eraser to remove any part of the mic over the speaker.)
C/P Element 58.
 Resize by 30%. Dropshadow.
Position to the left of the speaker and mic.
Type out your font along the top of the frame.
Apply inner bevel.
Add Gradient Glow of 3 in black.
Dropshadow.
Don't forget your copyright & Watermark.


Study Geek Chic tut...

Supplies Used:
Cute & Emo tube by Danny Lee. Get it at SATC.
Cute & Emo kit from Bibi's Collection. Get it at SATC.
Eyecandy 4000 Gradient Glow (Font Only)
Font: Lazy Girls

Open a new image size 500 by 500.
C/P Element 78.
Resize by 65%.
Select the inside of the frame using your magic wand.
Selections, Modify, Expand by 3.
Add a new raster layer under the frame layer.
C/P Paper 15 into selection.
Deselect.
Dropshadow frame.
C/P Element 29.
Position along the top of the frame.
Using your eraser tool remove the large ring on the right side of the chain.
C/P Element 48.
Resize by 75%. Dropshadow.
Position near the inside right corner of the frame.
C/P Element 19.
Resize by 40%. Dropshadow.
Position to the right of the sucker sticks.
C/P Element 30.
Resize by 40%. Dropshadow.
Position over the left side of the sucker sticks.
C/P Element 70.
Resize by 40%. Dropshadow.
Position under the left side of the lipstick.
C/P Element 49.
Resize by 15%. Dropshadow.
Position at the bottom of the plate stack.
C/P Element 10.
Image, Mirror.
Resize by 30%. Dropshadow.
Position to the left of the coffee.
C/P yout tube.
Dropshadow.
Position to the left of the frame.
C/P Element 75.
 Resize by 60%. Dropshadow.
Position to the right of the tube.
Type out your font.
Apply inner bevel of choice.
Add Gradient Glow of 3 in white.
Dropshadow.
Select your background layer.
C/P Element 67.
Resize by 125%.
Don't forget to add your copyright & Watermark.


Garden Of The Geisha tut....

Supplies Used:
Geisha tube by Danny Lee. Get it at SATC.
Geisha kit by Bibi's Collection. Get it at SATC.
Mask Of Choice
Eyecandy 4000 Gradient Glow (Font Only)
Font: Selfish

Open a new image size 500 by 500.
Selections, Select all.
C/P Paper 7 into selection.
Deselect.
Apply mask of choice and merge group.
C/P Element 54.
Resize by 60%. Dropshadow.
C/P Element 17.
Resize by 40%. Dropshadow.
Position over the right side of the frame.
C/P Element 11.
Image, Mirror.
Resize by 30%. Dropshadow.
Position starting at the bottom right of the bonsai tree.
C/P Element 2.
Resize by 40%. Dropshadow.
Position to the left of the bonsai tree.
C/P Element 46.
Resize by 40%. Dropshadow.
Use your deform tool to position on an angle over the middle of the bonsai base.
C/P Element 74.
Image, Flip & Mirror.
Position at the bottom of the bonsai tree.
Duplicate & Mirror.
C/P Element 56.
Image, Flip.
Resize by 40%. Dropshadow.
Position at the bottom of the tree & Fountain.
C/P Element 85.
Resize by 40%. Dropshadow.
Position over the bottom right of the fan & Bonsai tree.
C/P Element 1.
Resize by 20%. Dropshadow.
Position under the cherry blossom branch.
C/P your tube. Dropshadow.
Type out your font.
Apply inner bevel of choice.
Add Gradient Glow of 3 in white.
Dropshadow.
Don't forget your copyright & Watermark.


Saturday, April 27, 2013

Punish The Heartbroken tut...(FTU)

Supplies Used:
Heartbroken tube by Spazz. get it at SATC.
The Punishment Sampler by Gothic Inspirations. Get it HERE.
Eyecandy 4000 Gradient Glow (Font Only)
Font: Dogma

Open a new image size 500 by 500.
C/P Frame 4.
Resize by 65%.
Duplicate frame.
Change the layer property on the top frame to multiply.
Dropshadow the original frame.
Using your lasso tool select around the outside edge of the frame.
Add a new raster layer under the frame layer.
C/P Paper 3 into selection.
Deselect.
C/P Half Moon.
Resize by 30%. Dropshadow.
Position over the top right corner of the frame.
C/P Fog.
Resize by 75%.
Position over the top half of the frame.
C/P Candle.
Resize by 40%. Dropshadow.
Duplicate candle.
Position candles over the bottom right of the frame.
C/P Lantern.
Resize by 40%.
Position to the bottom right of the candles.
Duplicate Lantern.
Change the layer property to multiply.
Dropshadow the original lantern.
C/P Glitter.
Image, Rotate, Free rotate 90 degrees.
Resize by 40%. Dropshadow.
Position over the bottom of the frame.
C/P Heart Border.
Dropshadow.
Position at the bottom of the frame.
C/P Raven 1.
Resize by 20%. Dropshadow.
Position at the bottom of the lantern.
C/P Stump.
Resize by 40%. Dropshadow.
Position over the bottom left of the frame.
C/P your tube.
Dropshadow.
Type out your font.
Apply inner bevel of choice.
Add black gradient Glow of 3.
Dropshadow.
Select your background layer.
C/P Tag Back.
Resize by 75%. Dropshadow.
Center under the frame.
Don't forget your copyright & Watermark.


Waiting At The Marina tut...

Supplies Used:
Marina Collection by Zindy & CBJ. Get it HERE.
Eyecandy 4000 Gradient Glow (Font Only)
Mask Of Choice.
Font: The Nautigal

Open Frame 1.
Select the inside of the frame using your magic wand.
Selections, Modify, Expand by 8.
Add a new raster layer under the frame layer.
C/P Paper 9 into selection.
Deselect.
Dropshadow frame layer.
C/P Splash 1.
Center over the bottom of the frame.
Dropshadow.
C/P Plants 2.
Resize by 65%. Dropshadow.
Center over the bottom of the frame.
C/P Plants. 
Resize by 65%. Dropshadow.
Position over the bottom of the frame.
C/P Large Rope.
Resize by 75%. Dropshadow.
Position over the bottom right of the frame.
C/P Chest.
Resize by 30%. Dropshadow.
Position over the bottom right of the pole.
C/P Shell Group.
Resize by 30%. Dropshadow.
Position over the bottom right of the chest.
C/P Anchor Chain.
Resize by 50%. Dropshadow.
Position over the left side of the chest.
C/P Bird.
Resize by 30%. Dropshadow.
Duplicate bird.
C/P your tube.
Dropshadow.
Type out your font along the top of the frame.
Apply inner bevel of choice.
Add Gradient Glow of 3 in white.
Select your background layer.
Add a new raster layer.
Flood Fill color #183866.
Apply mask of choice.
Merge group.
Don't forget your copyright & Watermark.


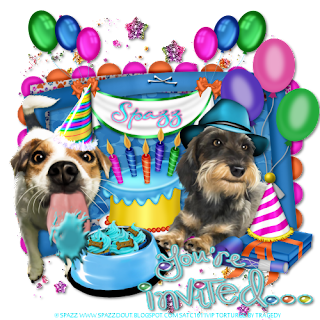
It's My Paw-ty tut...

Supplies Used:
B Day Pup 2013 tube by Spazz. Get it at SATC.
Ace tube by Spazz. Get it at SATC.
Puppy Wuppy Birthday kit from Fabulous Dezigns. Get it at SATC.
Eyecandy 4000 Gradient Glow
Font: Scrap Cursive

Open a new image size 500 by 500.
C/P Frame 1.
Resize by 65%.
Select the inside of the frame using your magic wand.
Selections, Modify, Expand by 3.
Add a new raster layer under the frame layer.
C/P Paper 20 into selection.
Deselect.
Dropshadow frame.
C/P Birthday Bash.
Resize by 50%. Dropshadow.
Position near the center of the frame.
Type out your font over the banner.
Apply inner bevel of choice.
Add Gradient Glow of 3.
C/P Balloons.
Resize by 50%. Dropshadow.
Position over the right side of the frame.
C/P your tubes.
Dropshadow.
C/P Birthday Present.
Resize by 30%. Dropshadow.
Position over the bottom right corner of the frame.
C/P Blue Noise Maker.
Image, Mirror.
Resize by 30%. Dropshadow.
Position over the bottom left side of the gift.
C/P You're Invited Word Art.
Resize by 30%.
Add fat Gradient Glow of 3, White in the first color tab, Blue in the 2nd.
Dropshadow.
Position over the bottom right of the canvas.
Select the background layer.
C/P Glitter Splats.
Resiz eby 50%. Dropshadow.
Position under the top left of the frame.
Duplicate and mirror.
Merge down layer.
Duplicate, Flip, & Mirror.
Don't forget your copyright & Watermark.


Half Alive tut....

Supplies Used:
Ambivalence tube by Rebecca Roske. Get it at DSI.
Ambivalence kit from Gothic Inspirations. Get it at DSI.
Eyecandy 4000 Gradient Glow (Font Only)
Font: Swan Song

Open a new image size 500 by 500.
C/P Mask.
Resize by 75%. Dropshadow.
C/P Window.
Resize by 65%.
Select the inside of the frame using your magic wand.
Selections, Modify, Expand by 3.
Add a new raster layer under the frame layer.
C/P Paper 9 into selection.
Deselect.
Dropshadow frame.
C/P Blood Moon.
Resize by 50%. Dropshadow.
Position under the top right side of the window.
C/P Cloud.
Resize by 50%. Dropshadow.
Lower the opacity to about 80.
Duplicate cloud.
Position clouds over the moon.
C/P Tree 2.
Resize by 50%. Dropshadow.
Position near the bottom right of the window.
C/P Chandalier.
Resize by 30%. Dropshadow.
Position over the center of the window.
C/P your tube. Dropshadow.
Position over the left side of the window.
C/P Lantern 1.
Resize by 60%. Dropshadow.
Duplicate Lantern 1.
Stagger lanterns over the left side of the frame.
C/P Lantern 2.
Resize by 20%. Dropshadow.
Position about halfway down the posts of the original lamps.
C/P Jar.
Resize by 30%. Dropshadow.
Position over the bottom of Lantern 2.
C/P Word Art 2.
Resize by 40%. Dropshadow.
Position over the bottom left of the window.
Type out your font.
Apply inner bevel of choice.
Add Gradient Glow of 3 in black.
Dropshadow.
Don't forget your copyright & Watermark.


Friday, April 26, 2013

Lips Go Blue tut....

Supplies Used:
Tube by Hunter Cazador. This tube is a private commission but you can always contact Hunter HERE.
All Lips Go Blue kit from Manipulated By Magik. Get it HERE.
Eyecandy 4000 Gradient Glow (Font Only)
Font: Fire Of Ysgard Condensed

Open a new image size 500 by 500.
C/P Frame 5.
Resize by 75%. Dropshadow.
Using your lasso tool draw around the frame.
Add a new raster layer under the frame layer.
C/P Paper 3 into selection.
Add another new raster layer.
C/P Paper 6 into selection.
Change the layer property to Luminance.
Change the opacity to 70.
C/P Grave.
 Position under the bottom of the frame.
Selections, Invert, Delete.
Deselect.
Dropshadow grave.
C/P Vine.
Resize by 50%. Dropshadow.
Position over the top left of the frame.
C/P Jars.
Resize by 40%. Dropshadow.
Position near the bottom left corner of the frame.
C/P Candle 1.
Resize by 30%. Dropshadow.
Position under the top of the jars.
C/P Heart.
Resize by 30%. Dropshadow.
Use your deform tool to position on a slight angle over the bottom right of the jars.
C/P Vial.
Image, Mirror.
Resize by 30%. Dropshadow.
Position under the bottom right side of the heart.
C/P ALGB Skull.
Resize by 30%. Dropshadow.
Position over the left side of the heart.
C/P Spider.
Resize by 30%. Dropshadow.
Position over the top of the skull.
C/P your tube.
Dropshadow.
C/P Word Art.
Resize by 75%.
Position at the bottom of the elements.
Apply Gradient Glow of 3 in white.
Dropshadow.
Type out your font.
Apply inner bevel of choice.
Add Gradient Glow of 3 in white.
Dropshadow.
Don't forget your copyright & Watermark.


Thursday, April 25, 2013

Bostonian Strength tut...(FTU)

Supplies Used:
Beautiful FTU Boston tube is By Freya Langford-Sidebottom. This beautiful tube was a donation for all to use by Omneya in the wake of tragedy. Get it HERE.
FTU Kit from Gimptastic Scraps called Bostonian Strength. Get it HERE.
Eyecandy 4000 Gradient Glow (Font Only)
Font: Varsity

Open a new image size 500 by 500.
C/P Frame 1.
Resize by 75%.
Select the inside of the frame using your magic wand.
Selections, Modify, Expand by 3.
Add a new raster layer under the frame layer.
C/P Paper 7 into selection.
Deselect.
C/P your tube.
Dropshadow.
Use your eraser tool to remove the excess at the bottom of the frame.
C/P Ric Rac.
 Resize by 60%. Dropshadow.
Position near the bottom of the frame.
Use your eraser to remove any part of the ric rac off the frame.
C/P Flowers.
Resize by 40%. Dropshadow.
Position over the left side of the ric rac.
C/P Heart.
Use your deform tool to position under the top of the flowers.
Dropshadow.
C/P Mesh.
Resize by 40%. Dropshadow.
Use your deform tool to position over the right side of the heart.
C/P Star Scatter.
 Resize by 50%. Dropshadow.
Position at the top of the heart.
Select your background layer.
C/P Sequin Spill.
Resize by 75%. Dropshadow.
Posiiton under one side of the frame.
Duplicate & Mirror.
Click the top layer in your layer palette.
Type out your font.
Apply inner bevel of choice.
Add Gradient Glow of 3 in white.
Dropshadow.
Don't forget your copyright & Watermark.


Feels Like Paradise tut...

Supplies Used:
Tube by Joe Pekar. I don't think he sells in any store anymore :( But you can find his work HERE.
Feels Like Paradise kit from Tasha's Playground. Get it HERE.
Eyecandy 4000 Gradient Glow (Font Only)
Font: Summertime

Open a new image size 500 by 500
C/P Frame 1.
Resize by 90%.
Select the inside of the frame using your magic wand.
Selections, Modify, Expand by 3.
Add a new raster layer under the frame layer.
C/P Paper 3 into selection.
Deselect.
C/P Dolphin 1.
Resize by 50%. Dropshadow.
Position over the right water part of the paper.
C/P Sand 2.
Position near the bottom of the frame.
C/P Rocks.
Resize by 50%. Dropshadow.
Position over the bottom right corner of the frame.
C/P Shell 4.
Resize by 50%. Dropshadow.
Position over the bottom right of the rocks.
C/P Starfish.
Resize by 50%. Dropshadow.
Position over the elft side of the shell.
C/P Shell 2.
Resize by 50%. Dropshadow.
Position at the bottom of the white shell.
C/P your tube.
Dropshadow.
C/P Word Art.
Resiz eby 50%. Dropshadow.
Position at the bottom of the shells.
Type out your font.
Apply inner bevel of choice.
Add Gradient Glow of 3 in white.
Dropshadow.
Don't forget your copyright & Watermark.


Monday, April 22, 2013

Under The Sea tut...

Supplies Used:
Tube by Ted Hammond. Get it at CDO.
Mermaid kit from Designs By Joan. Get it at SATC.
Eyecandy 4000 Gradient Glow & HSB Noise (Font Only)
Font: The Nautigal

Open a new image size 500 by 500.
C/P Element 2.
Resize by 85%. Dropshadow.
Use your lasso tool to select around the inside of the arch.
C/P Paper 11 as a new layer.
Position under the arch as desired.
Selections, Invert, Delete.
Deselect.
C/P Element 17.
Resize by 60%. Dropshadow.
Position over the bottom of the arch.
C/P Element 54.
Position near the top of the sand.
C/P Element 29.
Resize by 50%. Dropshadow.
Position near the top of the wave over the inside of the arch.
C/P Element 4.
Resize by 50%. Dropshadow.
Position near the bottom of the wave.
C/P Element 27.
Resize by 50%. Dropshadow.
Position over the top left of the arch.
(If Desired your can use your eraser to remove part of the frames.)
C/P Element 11.
Resize by 50%. Dropshadow.
Position over the right side of the arch.
C/P Element 52.
Resize by 50%. Dropshadow.
Position over the right side of the arch.
C/P Element 71.
Image, Mirror.
Resize by 30%. Dropshadow.
Position at the bottom left of the arch.
C/P Element 67.
Image, Mirror.
Resize by 50%. Dropshadow.
Position at the bottom right of the arch.
C/P your tube.
Dropshadow.
Type out your font & convert to raster layer.
Apply Eyecandy 4000 HSB Noise.
Add Inner Bevel.
Apply Gradient Glow of 3.
Dropshadow.
Don't forget your copyright & Watermark.


Sunday, April 21, 2013

Nature's Dance tut & Clusterframe....

Supplies Used:
Belly Dancer tube by Christine Marie Kotlark. Get it at SATC.
Ala Forest Fairy kit by Puddicat Creations. I seem to have a knack for using old kits lately so once again I will include a cluster frame. You can get her current kits at SATC.
Eyecandy 4000 Gradient Glow (Font Only)
Font: Ukranian Brush Script.

Open a new image size 500 by 500.
C/P Frame 1.
Resize by 65%.
Select the inside of the frame using your magic wand.
Selections, Modify, Expand by 3.
Add a new raster layer under the frame layer.
C/P Paper 15 into selection.
Selections, Invert.
Open House 1.
Image, Mirror.
C/P onto your tag.
Resize by 50%.
Position along the right side of the frame & hit delete on the keyboard.
C/P Ground 1.
Resize by 50%.
Position along the bottom of the frame and hit delete on your keyboard.
C/P Tree 2.
Resize by 50%.
Position along the left side of the frame and hit delete on the keyboard.
C/P Water pump 1.
 Resize by 30%.
Position under the left corner of the frame & hit delete on the keyboard.
Deselect.
C/P Vines 3.
Resize by 65%.
Position over the left side of the frame.
Using your eraser tool remove any part of the vine over the inside of the frame.
Duplicate vine & Mirror.
C/P Spanish Moss 2.
Image, Flip.
Resize by 50%. 
Position over the bottom left corner of the frame.
Duplicate & Mirror.
C/P Spanish Moss 1.
Image, Mirror.
Resize by 30%.
Position over the top right of the frame.
C/P Butterfly 2.
Resize by 15%.
Position to cover the top of spanish moss 1.
C/P Butterfly 1.
Resize by 15%.
Position down slightly from the other butterfly.
C/P Harp 1.
Resize by 30%.
Position over the bottom left corner of the frame.
C/P your tube.
C/P Candle 1.
Resize by 30%. 
Duplicate.
Move one candle under the blanket of the tube layer, The other position over the right of the harp.
Dropshadow Elements, Frame, & Tube layers.
Type out your font.
Apply inner bevel of choice.
Add Gradient Glow of 3.
Dropshadow.
Don't forget your copyright & Watermark.
 
And in case you need it...Click then right click to save....
 

School Daze Mini tut & Cluster Frame...

Supplies Used:
Colorful Skool kit by Bibi's Collection. This was part of a collab in the past but you can find her kits at SATC.
Naughty School Girl tube by Spazz. Get it at SATC.
Font: Chubby Cheeks

What I Used:
Paper 2
Element 60 (rotate)(50%)
Element 19 (30%)
Element 26 (30%)
Element 36 (40%)
Element 37 (40%)
Element 20 (Mirror)(30%)
Element 39 (65%)
Element 43 (40%)
Element 51

And here is a cluster frame in case you don't have the kit...Click then right click to save...

Saturday, April 20, 2013

Land Of Oz tut...

Supplies Used:
Tube by Jasmine Becket-Griffith. Get it at CDO.
Kit by Rebel Dezigns. Get it at CDO.
Eyecandy 4000 Gradient Glow 
Font: Society Editor

Open a new image size 500 by 500.
C/P Frame 2.
Resize by 65%.
Select the inside of the frame using your magic wand.
Selections, Modify, Expand by 3.
Add a new raster layer under the frame layer.
C/P Paper 2 into selection.
Deselect.
C/P Element 6.
Resize by 30%. Dropshadow.
Position under the center of the frame.
C/P Element 11.
Resize by 40%. Dropshadow.
Position inside the upper right corner of the frame.
C/P Element 4.
Resize by 20%.
Duplicate & Mirror.
Position shoes over the yellow brick road.
C/P Element 8.
Resize by 35%. Dropshadow.
Position inside the upper left hand corner of the frame.
C/P Element 5.
Resize by 30%. Dropshadow.
Use your deform tool to position over the upper left corner of the frame.
C/P Element 15.
Resize by 30%. Dropshadow.
Use your deform tool to position over the top of the clock.
C/P your tube.
Dropshadow.
Position over the bottom left corner of the frame.
C/P Element 3.
Resize by 30%. Dropshadow.
Position about halfway up the left side of the frame.
C/P Element 9.
Resize by 30%. Dropshadow.
Position to the right of the wand.
C/P Word Art.
Resize by 50%. Dropshadow.
Add Fat Gradient Glow of 3.
Dropshadow.
Position over the bottom right of the frame.
Type out your font.
Apply inner bevel of choice.
Dropshadow.
Add Fat Gradient Glow of 3.
Dropshadow.
Don't forget your copyright & Watermark.

Princess Of The Jungle

Supplies Used:
Pussycat Doll tube by Danny Lee. Get it at SATC.
Pussycat Dreams kit from Bibi's Collection. Get it at SATC.
Eyecandy 4000 Gradient Glow (Font Only)
Font: Sleeping Beauty
 
Open a new image size 500 by 500.
C/P Element 37.
Resize by  75%.
Select the inside of the frame using your magic wand.
Selections, Modify, Expand by 3.
Add a new raster layer under the frame layer.
C/P Paper 3 into selection.
Deselect.
C/P Element 73.
 Resize by 30%. Dropshadow.
Position under the top edge of the bottom of the frame.
C/P Element 40.
Resize by 50%. Dropshadow.
Position over the top of the paper layer.
Dropshadow frame.
C/P Element 33.
Resize by 40%. Dropshadow.
Position over the bottom right of the frame.
C/P Element 49.
Resize by 40%. Dropshadow.
Position over the bottom left of the frame.
C/P Element 34.
Resize by 40%. Dropshadow.
Duplicate Torch.
Position under the top edge of the heart element.
C/P Element 65.
Image, Mirror.
Resize by 50%. Dropshadow.
Position under the top edge of the heart element.
Duplicate flowers and flip.
Duplicate flowers.
Position flowers under the bottom edge of the heart element.
C/P your tube.
Dropshadow.
Position over the leaves.
Type out your font.
Apply inner bevel of choice.
Add Gradient Glow of 3.
Dropshadow.
Don't forget your copyright & Watermark.


Friday, April 19, 2013

Princess Party mini tut...

Supplies Used:
Nina 1 tube by Bonnie's Creations. Find this tube with a few variations at PFD.
Whimsy kit by Abstract Creations. Get it at CDO.
Font: Chubby Cheeks

What I Used:
Paper 4
Element 19 (65%)
Element 5 (50%)
Element 33 (50%)
Element 12 (50%)
Element 12 (50%)(Deform shorter by half)
Element 15 (50%)
Element 23 (50%)
Element 37 (50%)