Friday, October 3, 2014

Blog Award..

So ages ago my wonderful friend Jeannie or as you know her Magik from Manipulated By Magik sent me this stunning award. Honestly I been so far away from PSP land for so damn long I just never got around to sharing it!!

  I would love to share this with the following amazing blogs!! Be sure to check out some of the amazing scraps and tags these bloggers create...It will blow your mind!!


Happy Haunting tut...

What I used:
Sabina Halloween tube by Celinart Pinup. Get it HERE.
Happy Haunting kit from Manipulated By Magik. Get it at Mystical Scraps.
Eyecandy 4000 Gradient Glow
Mask of choice
Font: Selfish

Open a new image size 500 by 500.
Selections, Select all.
C/P Paper 13 into selection.
Deselect.
Apply mask of choice and merge group.
C/P Ouija Board.
Use your deform tool to position on an angle.
Change the layer property to hard light.
Dropshadow.
C/P Moon.
Position over the left side of the mask.
Duplicate and mirror.
Moon should wrap to look like a circle now.
C/P tree.
Position over the center of the tag and dropshadow.
Duplicate tree.
Resize by 50%.
Duplicate resized tree.
Position trees around your mask layer to fill any bare spots.
C/P Spook House.
Resize by  75%. Dropshadow.
Position over the right side of the moon.
C/P Clouds.
Position near the top of the spook house.
Duplicate & Mirror.
Position near the bottom of the house.
C/P Bats.
 Resize by 20%. Dropshadow.
Duplicate 2 times.
Position over your clouds.
C/P Candelabra.
Resize by  50%. Dropshadow.
Position over the bottom right of the spook house.
C/P Witchpot.
Resize by 40%. Dropshadow.
Position over the bottom of the candelabra.
C/P your tube.
Dropshadow.
C/P word art 2.
Resize by 50%.
Apply thin gradient glow of 15.
Dropshadow.
Position over the bottom right of the tag.
C/P Candy.
Resize by 10%. Dropshadow.
Duplicate a few times and add to the top of the pumpkin basket on the tube.
Type out your font.
Apply same gradient Glow as before.
Dropshadow.
Don't forget to add your copyright & Watermark.

Wednesday, July 9, 2014

Into The Night tut...

Ok so....I have had no mojo for months now!!! Hopefully I can pick it up but I just havent been feeling it :( That said I love this kit and just had to use this!!

Supplies Used:
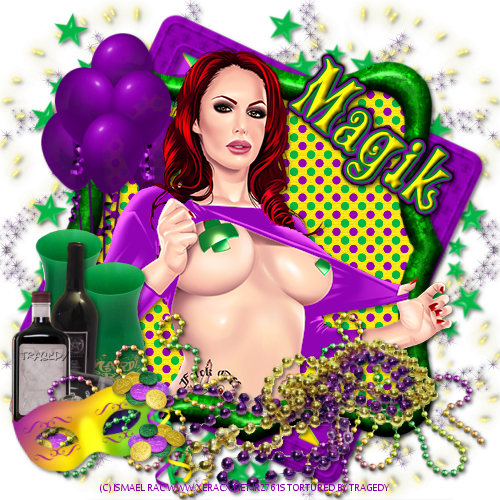
Tube ©John McMurtrie. This was something a friend tubed for me :P
Kit: Into The Night from manipulated By Magik. Get it HERE.
Eyecandy 4000 Gradient Glow
Xero porcelain 
Font: Fires Of Ysgard condensed

Open a new image size 500 by 500.
C/P Frame 5.
Resize by 75%.
Select the inside of the frame using your magic wand.
Selections, Modify, Expand by 3.
C/P background as a new layer.
Move under the frame layer.
Selections, Invert.
Hit delete on the frame layer.
C/P your tube.
Position under the left side of the frame.
Hit delete.
Deselect.
Adjust hue/saturation on your tube both to 0.
Apply Xero porcelain with the following settings...
Dropshadow tube.
Change the layer property to Hard Light.
C/P Sparkle Ring.
Position over the top of the frame.
C/P Sparkles.
Resize by 60%.
Position near the bottom right of the frame.
C/P Word Art 1.
Resize by 75%.
Apply inner bevel of choice.
Add standard Gradient Glow of 3 in black.
Apply Gradient glow again with the following settings...

 Dropshadow Word Art.
C/P Bottle.
Resize by 40%.
Dropshadow.
Position over the right side of the frame.
C/P Roses.
Resize by 60%. Dropshadow.
Position over the top of the bottle.
Use your eraser tool to remove any part of the stems over the bottle.
C/P Candle.
Resize by 60%. Dropshadow.
Position under the right side of the bottle and roses.
C/P Skull Pile.
Resize by 40%. Dropshadow.
Position over the skull on the candle.
C/P Rose 1.
Image, Mirror.
Resize by 30%. Dropshadow.
Position under the left side of the skull pile.
C/P Rose 3.
Image, Mirror.
Resize by 20%. Dropshadow.
Position over the top left of the skull pile.
Duplicate rose.
Change the layer property on the top rose to multiply.
Dropshadow original blue rose layer.
C/P Butterfly.
Resize by 20%. Dropshadow.
Position at the top of the skull on the left.
Move your word art layer on top of the other elements.
Duplicate your frame layer.
Change the layer property to multiply.
Dropshadow original frame layer.
C/P Glitter Scatter.
Resize by 75%.
Position under the top right side of the paper layer.
Duplicate & Mirror.
Layers: Merge down.
Duplicate scatter and flip.
Type out your font.
Apply inner bevel of choice.
Duplicate same gradient glows as above.
Don't forget to add your copyright & Watermark.


Monday, April 14, 2014

Sweet Spring Mini tut...

Supplies Used:
Easter Sweet tube by Pandora Creations. Get it at S&Co.
Spring Fling kit from Manipulated By Magik. Get it HERE.
Eyecandy 4000 Gradient Glow (Font Only)
Font: Seasons-Spring.

What I Used:
Frame 1 (90%)
Paper 4
Paper 5 (Luminance L)
Frame 2 (75%)
Rainbow
Tree
Spring Song (30%)
Clover Swirl (65%)
Bee (15%)(2x)


Sunday, April 13, 2014

Pastel Easter Mini tut...

Supplies Used:
Sleeping Beauty kit from Celinart Pinup. Get it HERE.
Bunny Trail kit from Manipulated By Magik. Get it HERE.
Eyecandy 4000 Gradient Glow (Font Only)
Mask Of Choice
Font: SF Comic Script.

What I used:
Paper 7 (Mask)
Paper 6 (Frame Background)
Sparkles (2x)
Frame 6 (75%)
Flourish (60%)
Tree (60%)(Mirror)
Sign (60%)
 Birdhouse (50%)
Egg Cluster (15%)
Bird (15%)
Bunnykins (30%)


Monday, March 31, 2014

Maleficent's Curse tut...

Supplies Used:
Tina tube by Celinart Pinup. Get it HERE.
Maleficent kit from Hania Design. Get it HERE.
Eyecandy 4000 gradient Glow & HSB Noise (Font Only)
Font: Walt Disney script v4.1 & Minister #4

Open a new image size 500 by 500.
Selections, Select all.
C/P Paper 6 into selection.
Duplicate paper.
Change top paper layer property to multiply.
Change the opacity to about 88.
C/P Element 16.
Resize by 75%.
Dropshadow.
Position near the bottom right corner of the paper.
C/P Element 36.
Resize by 85%.
Position under the top left of the castle.
Change the layer property to Luminance (L)
C/P Element 41.
Resize by 75%.
Dropshadow.
Position over the moon.
C/P Element 64.
Resize by 50%. Dropshadow.
Position over the right side of the castle.
C/P Element 2.
Resize by 8%. Dropshadow.
Duplicate a few times.
Position over the vines.
C/P Element 80.
Resize by 30%. Dropshadow.
Position over the grass on the bottom right of the castle.
C/P Element 65.
Resize by 30%. Dropshadow.
Position over the left side of the spinning wheel.
C/P Element 46.
Resize by 25%. Dropshadow.
Position over the right side of the table.
C/P Element 60.
Image, Mirror.
Resize by 25%. Dropshadow.
Position to the right of the cauldron.
C/P Element 70.
Resize by 20%. Dropshadow.
Position over the bottom left of the table.
C/P your tube.
Dropshadow.
Using the Disney font type out your text (I used a quote from Sleeping Beauty.)
Apply Eyecandy 4000 HSB Noise.
Add inner bevel of choice.
Dropshadow.
Add Gradient Glow of 5.
Dropshadow.
Using the Minister #4 font type out your name.
Apply Eyecandy 4000 HSB Noise.
Add inner bevel of choice.
Dropshadow.
Add Gradient Glow of 5.
Dropshadow.
Don't forget to add your copyright & Watermark.
 

Thursday, March 27, 2014

The Fairest tut....

Supplies Used:
Daisy tube by Celinart Pinup. Get it HERE.
Snow White kit from Hania Design. Get it HERE.
Eyecandy 4000 gradient Glow (Font Only)
Mask Of Choice
Font: Walt Disney Script V 4.1

Open a new image size 500 by 500
Selections, Select all.
C/P Paper 4 as a new layer.
Selections, invert, Delete.
Deselect.
Apply mask of choice and merge group.
C/P Element 130.
Resize by 35%.
Change the layer property to Luminance (L)
Duplicate.
Position the shrubs to fill the empty space by the towers. If necessary use your eraser tool to remove any excess over the towers.
C/P your tube. (You can wait til the end but I used mine for positioning.)
C/P Element 37.
Resize by 75%.
Position under your tube.
Duplicate tree.
Change the layer property on the top tree to multiply.
C/P Element 133.
Resize by 35%. 
Duplicate butterflies and mirror.
Position butterflies over the branches of the tree.
C/P Element 15.
Resize by 35%.
Position near the bottom left of the tag.
C/P Element 61.
Resize by 25%.
Change the layer property to Luminance (L).
Position over the bottom of the tree/top of water.
On the water layer use your eraser tool to remove any water showing through the bricks.
C/P Element 57.
Resize by 25%.
Position over the right side of the water.
Change the layer property to Luminance (L).
Change the opacity to 92.
C/P Element 24.
Adjust Hue/Saturation both to 0.
Resize by 35%.
Position under the left side of the bridge.
Duplicate and mirror.
Use your eraser tool tool to remove stones as needed.
Type out your font.
Apply inner bevel of choice.
Add gradient Glow of 3 in yellow.
Dropshadow.
Change the layer property to Luminance.
Type out your Name.
Apply inner bevel of choice.
Add gradient Glow of 3 in yellow.
Dropshadow.
Duplicate name.
Change the layer property on the bottom layer to Screen and the top layer to Soft Light.
Don't forget to add your copyright and watermark.


Wednesday, March 26, 2014

Mystical Blue tut...


What I Used:
Blue Fairy Girl tube by Zindy S.D. Nielsen. Get it HERE.
Faerie Fantasy kit from Manipulated By Magik. Get it at Mystical Scraps.
Eye Candy 4000 Gradient Glow (font only)
Font: Layfayette Script

Open a new image size 550 by 550.
C/P Frame 4.
Resize by 75% .
Select the inside of the frame using your magic wand.
Selections, modify, expand by 3.
Add a new raster layer under the frame layer.
C/P paper 10 into selection.
Deselect.
C/P Rainbow.
Resize by 50%. 
Image, Mirror.
Dropshadow.
Position near the top of the frame.
C/P Sun Ball.
Resize by 50%. Dropshadow.
Position over the star of the rainbow.
C/P Bridge.
Image, Mirror.
Resize by 50%. Dropshadow.
Position near the bottom of the frame.
C/P Flower Wreath.
Dropshadow.
Position over the frame.
C/P Fern.
Resize by 75%. Dropshadow.
Duplicate and mirror.
Position ferns over the bottom of the frame.
C/P Flower Scatter.
Resize by 50%. Dropshadow.
Position over the ferns.
C/P Tree.
Resize by 50%. 
Duplicate tree.
Move tree over a tiny bit (to make the trunk thicker basically.)
Merge down.
Dropshadow tree.
Position over the right side of the frame.
C/P Mushrooms.
Resize by 25%. Dropshadow.
Position at the base of the tree.
C/P Unicorn.
Image, Mirror.
Resize by 40%. Dropshadow.
Position at the bottom of the tree.
C/P Faerie 2.
Resize by 15%. Dropshadow.
Duplicate and mirror.
Position faeries over the tree.
C/P Your tube.
Dropshadow.
Type out your font.
Apply inner bevel of choice.
Add fat Gradient Glow of 3 in white.
Dropshadow.
Select your background layer.
C/P Deco.
Use your deform tool to position under one side of the frame.
Dropshadow.
Duplicate and mirror.
C/P Bokah Scatter.
Use your deform tool to position under one side of the frame.
Duplicate and mirror.
Don't forget to add your copyright & Watermark.


Monday, March 3, 2014

Lucky Bunny tut...(FTU)

Supplies:
St Patrick's tube from Danny Lee. Get it from Scraps N Company.
Irish Charm Add-On from Manipulated By Magik. Get it HERE.
Template 0037 from Manipulated By Magik. Get it HERE.
Eyecandy 4000 Gradient Glow (Font Only)
Font: KG Luck Of The Irish

This one is super easy but I didnt wanna mess it up adding elements I did not need.

Open the template.
Delete credit, Background, And all 3 Word Art Layers.
Select the Small center Circle 3.
Selections, Select all, Float.
Add a new raster layer.
C/P Paper 6 into selection.
Deselect.
Delete original circle layer.
Dropshadow all the template layers and the paper.
C/P Mushroom home.
Resize by 75%. Dropshadow.
Position to the bottom right of the center circle..
C/P Flower Doodle.
 Resize by 50%. Dropshadow.
Position at the bottom of the Mushroom.
C/P Rainbow & Gold.
Resize by 125%.
Image, mirror.
Position at the top of the mushroom.
C/P Bunny.
Resize by 50%. Dropshadow.
Position to cover the pot of gold.
C/P  your tube.
Dropshadow.
Type out your font.
Apply inner bevel of choice.
Add gradient Glow of 5.
Dropshadow.
Don't forget your copyright & Watermark.


Ghoulish Garden tut...

What I used:
Lily Goth Mermaid tube by Celinart. Get it HERE.
Shadow Princess kit from Pink Paradox productions. Get it HERE.
Eyecandy 4000 Gradient Glow (font Only)
Mask of choice
Font: Swedie Cruel

Open a new image size 500 by 500.
Selections, Select all.
C/P Paper 10 into selection.
Deselect.
Apply mask of choice and merge group.
C/P Element 134.
Resize by 45%. Dropshadow.
Use your lasso tool to select around the outside of the window.
C/P Paper 10 and move under the window layer.
Selections, Invert, Delete.
Deselect.
Duplicate paper and change the property to multiply.
Duplicate paper again.
C/P Element 130.
Resize by 40%. Dropshadow.
Position under the right side of the window.
(If Necessary erase any part of the castle that sticks out of the bottom of the frame.)
C/P Element 164.
 Resize by 40%. Dropshadow.
Position over the left side of the frame.
C/P Element 2.
Resize by 40%. Dropshadow.
Position over the top of the tree.
C/P Element 153.
Resize by 30%. Dropshadow.
Position over the trunk of the tree.
C/P Element 131.
Resize by 30%. Dropshadow.
Duplicate and mirror.
Position under the bottom of the window layer.
C/P Element 158.
Resize by 25%. Dropshadow.
Position along the bottom left side of the window using your deform tool. 
Duplicate leaves and mirror.
C/P Element 141.
Resize by 15%. Dropshadow.
Position near the bottom center of the window sill.
C/P Element 87.
Resize by 30%. Dropshadow.
Position over the bottom left corner of the frame.
C/P Element 89.
Resize by 30%. Dropshadow.
Position to the bottom right of the reaper.
C/P Element 149.
Resize by 15%. Dropshadow.
Type out your font.
Apply inner bevel of choice.
Dropshadow.
Add Gradient Glow of  5.
Dropshadow.
Don't forget your copyright & Watermark.


Thursday, February 20, 2014

Show Me The Mardi Gras tut...

What I Used:
Naughty Attitude tube from Ismael Rac. Get it HERE . (I recolored for this tag)
Carnival kit from Manipulated By Magik. Get it HERE.
Eyecandy 4000 gradient Glow (Font Only)
Font: Mardi Gras

Open a new image size 500 by 500.
C/P Frame 6.
Resize by 70%.
Using your deform tool position frame on a slight angle.
Select the inside of the frame using your magic wand.
Selections, Modify, Expand by 3.
Add a new raster layer under the frame layer.
C/P paper 11 into selection.
Deselect.
Dropshadow frame.
C/P Frame 4.
Resize by 70%.
Select the inside of the frame using your magic wand.
Selections, Modify, Expand by 3.
Add a new raster layer under the frame layer.
C/P paper 5 into selection.
Deselect.
Dropshadow frame.
C/P Balloons.
Resize by 70%.
Dropshadow.
Position over the top left corner of the frame.
C/P your tube.
Dropshadow.
C/P Beads 2.
Resize by 50%. Dropshadow.
Position over one side of the bottom frame.
Duplicate & Mirror.
C /P Beads 3.
Resize by 80%. Dropshadow.
Position along the bottom of the frame.
C/P Glass.
Resize by 50%. Dropshadow.
Duplicate glass.
Position near the point on the left side of the frame.
C/P Liquor.
Resize by 50%. Dropshadow.
Position over the bottom of the glasses.
C/P Eye Mask 2.
Resize by 50%. Dropshadow.
Image, Mirror.
Position using your deform tool at the bottom of the liquor bottles.
C/P Dubloons.
Resize by 15%. Dropshadow.
Position over the bottom right of the mask.
Duplicate and mirror.
Position over the top right of the mask.
Type out your font.
Apply inner bevel of choice.
Add eyecandy 4000 gradient Glow of 7...2nd tab looks like this...

Select your background layer.
C/P Fireworks 2.
Dropshadow.
Position under top left of the frame.
Duplicate and mirror.
Layer, merge down.
Duplicate and flip.
C/P Fireworks .
Dropshadow.
Position under top left of the frame.
Duplicate and mirror.
Layer, merge down.
Duplicate and flip.
C/P Confetti stars.
 Resize by 50%. Dropshadow.
Duplicate a few times and position under the edges of the frame using your deform tool.
Don't forget your copyright and watermark.


Fading Reality tut...(Animated)

What I Used:
Lily Goth Mermaid tube by Celinart Pinup. Get it HERE.
Gothic Mermaid kit from Pink Paradox Productions. Get it HERE.
Fine leather Texture (PSP 9)
Picture frame of choice (Mine is called Edge Design 01...no clue where I got it)
Eyecandy 4000 Gradient Glow
Mask of choice
Font: Xiomara
Animation Shop

Open a new image size 500 by 500.
Flood fill black.
Apply picture frame.
Adjust, Color Balance, Manual color correct to purple.
Apply Fine Leather with these settings...

Selections, Select all.
Add a new raster layer.
C/P Paper 10 into selection.
Deselect.
Apply mask of choice and merge group.
C/P Element 137.
Resize by 30%. Dropshadow.
Duplicate.
Position over the top right of the mask.
C/P Element 63.
Resize by 60%. Dropshadow.
Using your magic wand tolerance set to 10 select the inside of the mirror. (If necessary use your lasso tool set to remove to deselect any parts of the frame on the mirror.)
C/P your tube.
Selections, Invert, Delete.
Deselect.
Change the layer property to screen and the opacity to 70.
C/P Element 123.
 Resize by 30%. Dropshadow.
Use your deform tool to position.
C/P the following Elements:
Element 16
Element 17
Element 19
Element 21
Element 37.
Resize each element by 20% and dropshadow.
Type out your text.
Apply inner bevel of choice.
Dropshadow.
Add Eyecandy 4000 Gradient Glow of 5...Tab 2 should look like this....

 Don't forget to add your copyright & watermark.
If your choose not to animate just save your tag here. You can remove the frame and black fill layer too as it still looks good without it :)

To animate:
Copy merged and paste into animation shop.
Back in PSP lower the tube layer opacity to 60.
Copy merged and paste into animation shop after the current frame.
Back in PSP lower the tube layer opacity to 50.
Copy merged and paste into animation shop after the current frame.
Back in PSP lower the tube layer opacity to 40.
Copy merged and paste into animation shop after the current frame.
Back in PSP lower the tube layer opacity to 30.
Copy merged and paste into animation shop after the current frame.
Back in PSP lower the tube layer opacity to 20.
Copy merged and paste into animation shop after the current frame.
Back in PSP lower the tube layer opacity to 10.
Copy merged and paste into animation shop after the current frame.

Hit Shift + D on your keyboard to duplicate the animation.
Click on frame 1 of the duplicate.
Selections, Select all.
Animations, Reverse frames.
Copy and paste after current frame of your original animation.
Click frame 1 and hit selections, Select all.
Change the frame properties to 30.
View your animation.
Save with the following settings....

Hope you liked this tut! As always feel free to send me your results :P

Tuesday, February 18, 2014

Zombie Syren tut...

Supplies Used:
Lily Goth Mermaid tube by Celinart Pinup. Get it HERE.
Zombies kit from Hania's Design. Get it HERE.
Eyecandy 4000 Glass (font Only)
Mask Of Choice
Font: Zombie
 
Open a new image size 500 by 500.
Selections, Select all.
C/P paper 5 into selection.
Deselect.
Apply mask of choice and merge group.
C/P Element 103.
Dropshadow.\
Position over the top left of your mask.
C/P Element 47.
 Resize by 75%. Dropshadow.
Position near the bottom of the mask.
C/P Element 80.
Resize by 50%. Dropshadow.
Duplicate & mirror.
Position near the top of the mask.
C/P Element 76.
 Resize by 50%. Dropshadow.
Position along the top of the left side of the water.
C/P Element 68.
Resize by 50%. Dropshadow.
Position over the right side of the rocks.
C/P Element 3.
Resize by 50%. Dropshadow.
Position over the bottom of the rock formation.
C/P Element 55.
Resize by 40%. Dropshadow.
Position over the left side of the plant cluster.
Duplicate plant cluster.
Move above the rock in the layer palette.
Mirror plants and position st the bottom of the skull cave.
C/P Element 85.
Resize by 30%. Dropshadow.
Duplicate.
Position graves on the left side of the rock.
C/P your tube. Dropshadow.
Position on the rock to the right of the grave.
C/P Element 46.
Resize by 8%. Dropshadow.
Position over the hair of your tube.
C/P Element 24.
Dropshadow.
Position near the top of the skull.
C/P Element 90.
Resize by 50%. Dropshadow.
Duplicate.
Position over the right side of the skull.
C/P Element 94.
Resize by 40%. Dropshadow.
Position over bottom of the staffs.
C/P Element 48.
Resize by 75%. Dropshadow.
Mirror.
Position at the base of the rocks and water.
C/P Element 40.
Resize by 40%. Dropshadow.
Lower the opacity to about 40.
C/P Elements 6, 7, &8.
Resize by 20%.
Dropshadow.
Duplicate each fish and position over the top of the mask and coral.
Type out your font.
Apply Eyecandy 4000 Glass.
Change the layer property to Burn.
Dropshadow.
Don't forget your copyright & Watermark.


Monday, February 17, 2014

Ashes Of Fire tut...

What I Used:
Katty tube by Celinart Pinup. Get it HERE.
Katty Devil kit from Hania's Design. Get it HERE.
Eyecandy 4000 Gradient Glow (Font Only)
Font: Showgirl

Open a new image size 500 by 500.
C/P Element 10.
Resize by 50%.
Duplicate and flip.
Position flames near the top and bottom of the canvas.
Use your deform tool to stretch both sets of flames so they meet in the middle of the canvas.
C/P Element 12.
Resize by 85%.
C/P Element 91.
 Resize by 85%. Dropshadow.
Position at the bottom of the moon.
C/P Element 32.
Resize by 65%. Dropshadow.
Position tree so the branches run across the top of the moon.
C/P Element 15.
Resize by 85%. Dropshadow.
Position so the birds over the tree branches.
C/P Element 117.
Image, Mirror.
 Resize by 50%. Dropshadow.
Position over the right side of the moon.
C/P Element 107.
Resize by 50%. Dropshadow.
Position over the bottom of the gate.
C/P the following elements over the bottom of the gate:
Element 48 (50%)
Element 14 (30%)
Element 26 (30%)(Adjust hue/saturation to 0)
Element 20 (30%)
Element 8 (30%)
Element 39 (50%)
Element 85 (I removed the base and handle with my eraser tool)(50%)(7x)
Element 100 (30%)
C/P Element 75.
Resize by 30%. Dropshadow.
Duplicate lantern.
Position lanterns over the top left corner of the gate.
C/P your tube. Dropshadow.
Type out your font and convert to raster layer.
Apply inner bevel of choice.
Add Gradient Glow of 5 in black.
Don't forget your copyright & Watermark.


Sunday, February 16, 2014

Rosy Rossy tut...

What I Used:
Rossy tube by Vi Nina. Get it at S&Co.
Rossi kit from Designs By Joan. Get it at S&Co..
Eyecandy 4000 Bevel Boss & gradient Glow (Font Only)
Font: A&S Rhino

Open a new image size 500 by 500.
C/P Element 47.
Resize by 90%. Dropshadow.
C/P Element 13.
Resize by 65%.
Select the inside of the frame using your magic wand.
Selections, modify, Expand by 3.
Add a new raster layer under the frame layer.
C/P Paper 2 into the selection.
C/P Element 1.
Hit delete on your keyboard.
Deselect.
Dropshadow hearts.
C/P your tube.
Erase any part of the tube that hangs over the bottom of the frame.
Dropshadow original frame layer.
C/P Element 30.
Resize by 60%. Dropshadow.
Position over the bottom left of the frame.
C/P Element 31.
Resize by 40%. Dropshadow.
Position over the bottom right of the lipstick.
C/P Element 33.
Resize by 40%. Dropshadow.
Duplicate.
Position feathers along the bottom of the frame.
C/P Element 48.
Resize by 20%. Dropshadow.
Image, Mirror.
Position over the bottom of the lipstick.
C/P Element 47.
Resize by 20%. Dropshadow.
Position over the bottom of the perfume bottle.
C/P Element 28.
Resize by 60%. Dropshadow.
Position over the bottom tight of the frame.
C/P Elements 8 & 37.
Resize both by 40%. Dropshadow both.
Duplicate both elements.
Position single roses around the rose cluster as desired.
C/P Element 52.
Resize by 50%. Dropshadow.
Duplicate & Mirror.
Move under the original in the layer palette.
Position both envelopes over the center of the rose cluster.
C/P Element 53.
Resize by 40%.
Dropshadow.
Position over the left corner of the envelopes.
Type out your font.
Apply Eyecandy 4000 bevel Boss (Or Inner Bevel works too :)
Add Gradient Glow of 5 in black.
Dropshadow.
C/P Element 12.
 Resize by 40%. Dropshadow.
Position over your font.
Don't forget to add your copyright & Watermark.

Thursday, February 13, 2014

Irish Charm tut...

Supplies Used:
Katty tube by Celinart Pinup. Get it HERE.
Irish Charm kit from Manipulated By Magik. Get it HERE.
Mask Of Choice
Eyecandy 4000 Gradient Glow (Font Only)
Font: KG Luck Of The Irish

Open a new image size 500 by 500.
C/P Frame 5 as a new layer.
Resize by 75%.
Select the inside of the frame using your magic wand.
Selections, Modify, Expand by 13.
Add a new raster layer under the frame layer.
C/P paper 6 into selection.
Deselect.
Dropshadow frame.
C/P Glitter Trail.
Resize by 60%. Dropshadow.
Position over the bottom of the frame.
C/P Chain.
Resize by 60%. Dropshadow.
Position over the top inside of the frame.
C/P Flower Doodle.
Image, Rotate, free rotate 90 degrees.
Resize by 50%. Dropshadow.
Position over the top right side of the frame.
C/P Beer.
Resize by 50%. Dropshadow.
Duplicate Beer.
Position both beers in the lower right corner of the frame.
C/P Pot Of Gold.
Resize by 30%. Dropshadow.
Position over the left side of the glass bottoms.
C/P Mouse. 
Resize by 30%. Dropshadow.
Position over the top left of the pot of gold.
C/P your tube.
Dropshadow.
Position over the left side of the frame.
C/P Lips.
Resize by 8%.
Position over the booty on the tube LOL.
Type out your font.
Apply inner bevel of choice.
Add gradient Glow of 5.
Dropshadow.
Select your background layer.
C/P Paper 12.
Apply mask of choice and merge group.
Don't forget your copyright & Watermark!