Friday, August 31, 2012

Autumn Visions tut...

Supplies Used:
An Autumn Night tube by Zindy. Get it HERE.
Visions Of Autumn kit by Manipulated By Magik. Get it at PFD or Scrap-A-Licious.
Font: Segoe Script

Open a new image size 500 by 500.
C/P Frame 2. Resize by 70%.
Select the inside of the frame with your magic wand.
Selections, Modify, Expand by 3.
Add a new raster layer under your frame layer.
C/P paper 3 into selection.
Deselect.
Dropshadow frame.
C/P Butterfly Scatter. Resize by 50%. Dropshadow.
Position over the top right corner of the frame.
C/P your tube. Dropshadow.
C/P Old Log. Resize by 50%. Dropshadow.
Duplicate & Mirror. 
Position the logs over one another.
You may need to use your deform tool to make the logs a bit longer.
C/P Leaf Scatter. Resize by 50%. Dropshadow.
Use your deform tool to straighten out the leaves to be a bit more vertical.
Duplicate & Flip.
C/P Leaf 3. Resize by 50%. Dropshadow.
Image, Mirror.
Position over the top left corner of the frame.
Duplicate & flip.
C/P Branch. Resize by 50%. Dropshadow. Position the bottom off the stem over the middle of the leaves.
Duplicate & Flip.
You may need to use your eraser tool on the leaves & remove a bit of the stem.
C/P Flower 2. Resize by 25%. Dropshadow.
Position over the center of the left side of the frame.
C/P Leaves. Resize by 25%. Dropshadow.
Duplicate & Flip.
Position the leaves UNDER the right edge of the flower.
C/P Chestnuts. Resize by 25%. Dropshadow.
Position chestnuts UNDER the flower at the bottom set of leaves.
C/P Owl. Resize by 40%. Dropshadow.
Position over the left side of the log.
C/P Mushrooms 2. Resize by 50%. Dropshadow. 
Position at the right end of the old logs.
Type out your font over the log. 
Apply inner bevel of choice & Dropshadow.
Don't forget to add your copyright & Watermark

Sorbet & Cupcakes tut...

Supplies Used:
Lilly Sorbet tube by Celinart Pinup. Get it at SATC.
Drama Queen kit by Bibi's Collection. Get it at SATC.
Eyecandy 4000 Gradient Glow
Font: Satisfaction

Open a new image size 500 by 500
C/P E51. Resize by 75%.
Using your lasso tool draw along the inside ring of the frame.
Add a new raster layer under the frame layer.
C/P Paper 1 into selection.
Deselect.
C/P E23. Resize by 40%. Dropshadow.
Position near the top right of the frame.
C/P E43. Resize by 40%. Dropshadow.
Duplicate glass.
Position glasses about halfway down the stem of the roses.
C/P E81. Resize by 40%. Dropshadow.
Image, Rotate, Free Rotate 90 degrees.
Position over the right side of the frame.
Move your top glass above the glitter.
C/P E31. Resize by 40%. Dropshadow.
Position to cover the bottom of the glasses.
C/P E82. Resize by 40%. Dropshadow.
Image, Mirror. 
Position over the bottom of the purple heart.
C/P E64. Resize by 20%. Dropshadow.
Duplicate.
Position one cupcake on each side of the candies.
Type out your font.
Add inner bevel of choice.
Add gradient glow of 3. On tab 2 select black as your color. Then add a second color of light pink.
Dropshadow.
Don't forget your copyright & Watermark!

Strolling In Autumn tut...

Supplies Used:
Autumn Walk tube by Zindy. Get it HERE.
Autumns Kiss kit by Tasha's Playground. Get it at SATC.
Brushes Of Choice
Eyecandy 4000 Gradient Glow (Font Only)
Font: Blossom

Open a new image size 500 by 500.
C/P Window. Resize by 75%.
Select the inside of the window using your magic wand.
Selections, Modify, Expand by 3.
Add a new raster layer under the window layer.
C/P paper 4 into selection.
Using a green apply your brushes to the paper.
Deselect.
Dropshadow frame.
C/P Leaf Scatter. Dropshadow.
Position over the left side of the window.
Duplicate leaves.
Mirror & Flip.
Resize leave by 75% and position.
C/P Tree. Resize by 75%. Dropshadow.
Image, Mirror. 
Position the tree over the leaves on the left sid eof the window.
C/P Basket. Resize by 30%. Dropshadow.
Image, Mirror.
Position basket at the bottom of the tree.
C/P Squirrel. Resize by 30%. Dropshadow. 
Position on top the the acorns.
C/P Flowers. Resize by 50%. Dropshadow.
Duplicate flowers. Position both towards the top of the right side of the window.
C/P Mushroom 1. Resize by 50%. Dropshadow.
Position at the bottom of the flowers.
C/P Mushroom 2. Resize by 50%. Dropshadow.
Position under & to the left of mushrooms 1.
C/P Dead Grass. Resize by 40%. Dropshadow
Duplicate Grass. Position over the bottoms of the mushrooms.
C/P Wheelbarrow. Resize by 40%. Dropshadow.
Position at the bottom left side of the mushrooms.
C/P Gourds. Resize by 40%. Dropshadow.
Image, Mirror. Position to the right of the wheelbarrow.
C/P Pumpkin 2. Resize by 20%. Dropshadow.
Duplicate a few times and use to fill in the spaces around the gourds.
C/P Rabbit. Resize by 30%. Dropshadow.
Position over the gourds.
C/P Bird. Resize by 30%. Dropshadow.
Position over the top right side of the frame.
C/P your tube. Dropshadow.
Type out your font.
Apply Inner Bevel of Choice.
Add Gradient Glow of 3 in a contrasting color.
Dropshadow.
Don't forget you copyright and watermark.

Thursday, August 30, 2012

Naughty Girls tut...

Supplies Used:
Mary tube by Very Many. Get it at PFD.
Perfect Sex kit by Abstract Creations. This kit is exclusive to Digi Divas.
Eyecandy 4000 Gradient Glow
Fonts: SP Pretty Purkey & Swan Song

Open a new image size 500 by 500
C/P e29. Resize by 75%.
Select the inside of the frame with you magic wand.
Selections, Modufy, Expand by 2.
Add a new raster layer under the frame.
C/P Paper 10 into selection.
Deselect.
Dropshadow frame.
C/P E13. Resize by 40%. Dropshadow.
Use your deform tool to position the heart laying on its side almost to the middle bottom of the frame.
C/P E2.  Resize by 40%. Dropshadow.
Use your deform tool to position paddle on a slight angle near the middle left of the frame.
C/P E57. Resize by 40%. Dropshadow.
Position drink over the bottom of the paddle.
C/P E64. Resize by 40%. Dropshadow.
Use your deform tool to position on an angle over the bottom of the drink.
C/P E5. Resize by 20%. Dropshadow.
Use your eraser tool to remove any bits that hang over the bottom of the corset.
C/P E26. Resize by 40%. Dropshadow.
Position over the bottom left corner of the frame.
Use your eraser tool to remove the top heart that hangs over the corset.
C/P your tube over the rigth side of the frame.
Dropshadow.
C/P E3. Resize by 40%. Dropshadow.
Image, Flip.
Use your eraser tool to remove half of the handle over the hand of your tube.
Using the Pretty Purkey font type out Naughty girls at the top of the frame.
Apply inner bevel of choice.
Add Gradient glow of 3.
Dropshadow.
Using the Swan Song font type out Need Love too.
Apply inner bevel of choice.
Add Gradient glow of 3.
Dropshadow.
Don't forget to add your copyright & Watermark.
 

Wednesday, August 29, 2012

Autumn Hideaway tut...

Supplies used:
Autumn Look tube by Zindy. This is part of her Autumn pack which you can find HERE.
Forest Hideaway kit by Tasha's Playground. Get it at PFD.
Eyecandy 4000 Gradient glow (Font Only)
Font: SP Pretty Purkey

Open a new image size 500 by 500.
C/P frame 4. Resize by 85%.
Select the inside of the frame using your magic wand.
Selections, Modify, Expand by 3.
Add a new raster layer under the frame layer.
C/P paper 7 into selection.
Deselect.
C/P your tube. Dropshadow.
Dropshadow frame.
C/P Shutters. Resize by 85%. Dropshadow.
Position shutters at the bottom of the frame layer.
C/P Leaf Scatter. Dropshadow.
Position over the bottom left corner of the frame.
C/P Flowers. Resize by 85%. Dropshadow.
Position the flowers on the left side where the shutters and bottom of the frame meet.
C/P Mushroom 2. Resize by 50%. Dropshadow. 
Duplicate mushroom & Mirror.
Position the mushrooms at the bottom of the flowers.
C/P Acorns. Resize by 30%. Dropshadow. 
Position at the bottom of the mushrooms.
C/P Squirrel. Resize by 30%. Dropshadow. 
Position over the acorns.
C/P Tree. Resize by 50%. Dropshadow.
Position over the right shutter.
C/P Dead Grass. Resize by 50%. Dropshadow.
Position grass over the bottom of the tree.
C/P Branch. Resize by 30%. Dropshadow.
Image, Mirror. Position over the bottom of the grass.
C/P Bird. Resize by 30%. Dropshadow.
Duplicate & Mirror.
Position both birds inside the branch.
C/P Butterfly. Resize by 30%. Dropshadow.
Duplicate & mirror.
Position butterflies over the top of the right shutter.
Type out your font.
Apply inner bevel of choice.
Add Gradient Glow of 3.
Dropshadow.
Don't forget to add your copyright & Watermark.

Saturday, August 25, 2012

Hot For Teacher tut...

Supplies Used:
Mob Scene by Barbara Jensen. This tube is exclusive to SATC.
School Hottie kit by Tasha's Playground. Get it at SATC.
Eyecandy 4000 Gradient Glow & Glass
Fonts: Chalkboard & Compliments

Open a new image 500 by 500.
C/P Lockers 2. Resize by 75%. Dropshadow.
Move the lockers slightly up and to the left of the canvas.
C/P Heart. Resize by  20%.
C/P Lips 2. Resize by 20%.
C/P Star. Resize by 15%.
C/P Star 2. Resize by 15%.
Position stars, Lips, & Heart on the lockers like they are stickers.
C/P Chalkboard. Resize by 75%. Dropshadow. 
Use your deform tool to position on an angle over the bottom of the lockers.
C/P Notebooks. Resize by 50%. Dropshadow. 
Position notebooks under the top left corner of the chalkboard.
Using the Chalkboard font size 16 type out you font. I used lyrics from Van Halen's Hot For Teacher.
Convert to raster layer.
Change the opacity on the font to about 65.
C/P Pencil cup. Resize by 50%. Dropshadow.
Position near the middle left of the chalkboard.
C/P Calculator. Resize by 30%. Dropshadow.
Use your deform tool to position calculator on a slight left angle. 
Go to adjust, Sharpness, Sharpen.
Position to the left side of the bottom of the pencil cup.
C/P Glue. Resize by 30%. Dropshadow.
Use your deform tool to position on a slight right angle next to the calculator.
C/P Scatter. Resize by 50%. Dropshadow. 
Position at the bottom of the chalkboard.
C/P Marker. Resize by 30%. Dropshadow. Position at the bottom left corner of the chalkboard.
C/P Pencil. Resize by 30%. Dropshadow.
Use your deform tool to position the pencil pointing upwards.
C/P Eraser. Resize by 20%. Dropshadow.
Position eraser over the eraser on the pencil.
C/P  Sparkle 2. Resize by 75%. Dropshadow. 
Image, Mirror. Position to the top left of the chalkboard.
Duplicate & Flip sparkle.
C/P Scatter. Resize by 75%. Dropshadow.
Go to image, Rotate, Free rotate 90 degrees.
 Position to the left side of the lockers.
C/P Stars. Resize by 50%. Dropshadow.
Duplicate Stars & Flip.
Position the stars over the scatter.
C/P your tube. Dropshadow.
Position your tube over the stars.
C/P Books. Resize by 50%. Dropshadow. Position under the right side of your tube.
Type out your compliments font. I used "I'm Hot For Teacher"
Apply Eyecandy 4000 glass of choice.
Add Eyecandy 4000 Gradient glow of 3. On tab 2 select fat. Set the first box to black.
Go to adjust, Sharpness, Sharpen.
Dropshadow font.
Don't forget to add your copyright and watermark :P

Brutally Vicious tut...

Supplies Used:
Zombie Sid Vicious tube by Screaming Demons. Get it at SATC.
Vicious Rocks kit by Amy Marie. Get it at SATC.
Make Some Noise template by Tonya & Kat. Get it from the Creative Misfits blog HERE.
Eyecandy 4000  Gradient Glow & Glass
Fonts: Vulgar Display of Power & Jennifer's Handwriting

Open the template.
Delete the word art, Background, & info layers.
Resize the template to 550 pixels wide.
Starting at the bottom and working our way up...
C/P Wire 2. Resize by 50%.
Go to image, Rotate, Free rotate 90 degrees.
Dropshadow wire.
Position under the upper right side of the template.
Duplicate wire.
Go to image, Flip, Mirror.
C/P Element 24. Dropshadow. Position over the wire in the upper right corner.
Duplicate, Flip, & Mirror.
Select the glitter oval black layer.
Go to adjust, Color Balance, Manual color correct.
Set the source to color #0d9a5d and the target to color #6c8b3f.
Dropshadow Glitter Oval.
Select the oval layer.
Merge down.
Use your deform tool to bring the top of the oval down a bit.
Select the right Arrow Glitter Back.
Set the source to color #0d9a5d and the target to color #6c8b3f.
Dropshadow right arrow glitter back.
Select the right arrow.
Selections, Select all, Float.
Add a new raster layer.
C/P paper 15 into selection.
Deselect.
Delete original right arrow.
Select the left Arrow Glitter Back.
Set the source to color #0d9a5d and the target to color #6c8b3f.
Dropshadow left arrow glitter back.
Select the left arrow.
Selections, Select all, Float.
Add a new raster layer.
C/P paper 15 into selection.
Deselect.
Delete original left arrow.
Select the rectangle layer.
Selections, Select all, Float.
Add a new raster layer.
C/P paper 8 into selection.
Deselect.
Delete the original rectangle layer.
Dropshadow your new paper layer.
Select the bottom rectangle layer.
Selections, Select all, Float.
Open paper 8. Use your selection tool to choose a small portion of the paper.
C/P your selection into the selection on your tag.
Deselect.
Delete the original bottom rectangle layer.
Dropshadow the new paper bottom rectangle.
Select the white rectangle layer.
Selections, Select all, Float.
Add a new raster layer.
C/P Paper 21 into selection.
Deselect.
Delete the original white layer.
Dropshadow the Black Rectangle frame layer.
C/P Drums. Resize by 40%. Dropshadow. 
Position near the center of the black lightening paper layer.
C/P Element 68. Resize by 20%. Dropshadow.
Position over the top right corner of the black lightening paper layer.
C/P Speaker. Resize by 20%. Dropshadow. 
Duplicate speaker. Position both to the right of the drums.
C/P Element 71. Resize by 20%. Dropshadow. 
Position at the bottom of the speakers.
C/P Element 74. Resize by 30%. Dropshadow.
Use your deform tool to position the pass over the bottom of the road case.
C/P Element 67. Resize by 20%. Dropshadow.
Position over the pass.
C/P Guitar. Resize by 40%. Dropshadow.
Use your deform tool to position between the drums and the other elements.
Move the music notes to the top layer. 
Go to adjust, Color Balance, Manual color correct. Set the source to the pink color in the note, The target to a red in the tube. Dropshadow.
C/P your tube. Dropshadow.
Using the Vulgar Display Of Power font in caps color #959d6b type out "brutally".
Covert to raster layer.
Apply glass of choice.
Add Eyecandy Gradient Glow of 5 in #91160e.
Dropshadow.
Using the Jennifer's Handwriting for in color #91160e type out "Vicious"
Convert to raster layer.
Apply glass of choice.
Add Eyecandy 4000 Gradient glow of 3 in #959d6b.
Dropshadow.
Add your name repeating the steps with Jennifer's Handwriting.
Don't forget to add your copyright & Watermark.

Friday, August 24, 2012

Pinky Mini tut...

BCA tube by Celinart. This tube is no longer available but you can find many more by her at SATC.
Fashion Rock kit by Bibi's Collection. Get it at SATC.
Font: Segoe Script

What I used:
Paper 1 (Zebra)
Element 37 (Frame)  (75%)
Element 8 (75%)
Element 20 (20%)
Element 69 (40%)
Element 63 (20%) (Times 2)
Element 55 (40%)
Element 70 (40%)
Element 62 (40%)


Thursday, August 23, 2012

Blossoming Seasons tut...

Supplies Used:
Changing Seasons tube By Zindy. Get it HERE. (BTW...She is free with a $10 purchase for the month of august!)
Blossom kit by Abstract Creations. Get it HERE.
Eyecandy 4000 Gradient Glow (Font Only)
Mask of choice
Font: Yippy Skippy alt

Open a new image size 500 by 500.
C/P E29. Resize by 90%.
Select the inside of the frame with you magic wand. 
Selections, Modify, Expand by 3.
Add a new raster layer under the frame layer.
C/P Paper 7 into selection.
C/P E 14. Position under the frame.
Go to selections, Invert, Delete.
Deselect.
Dropshadow leaves.
Dropshadow frame.
C/P your tube. Dropshadow. Use your eraser to remove any bits that hang over the frame.
C/P E45. 
Image, Mirror.
Position over the top left of the frame. Dropshadow.
C/P E15. Dropshadow. Position so the flowers are in the blank space left by the rose doodle.
C/P E9. Resize by  75%.
Dropshadow Violin. 
Image, Mirror.
Position at the base of the flower layers.
C/P E13. Resize by 40%. Dropshadow. Duplicate.
Position glasses under the top of the body of the violin.
C/P E 30. Resize by 30%. Dropshadow. Position to the right of the glasses.
Move flowers under the glass layer.
C/P E7. Resize by 40%. Dropshadow.
Position over the bottom right of the violin.
C/P E26. Resize by 20%. Dropshadow. Position near the handle of the fan.
C/P E49. Resize by 20%. Dropshadow. Use your deform tool to position on a slight angle next to the heart lock.
Move under the heart lock.
Duplicate. Image, mirror. Position where the violin and fan meet.
Type out your font.
Apply Inner bevel of choice.
Add Gradient Glow of 3.
Dropshadow.
Select your background layer.
Go to selections, Select all.
Add a new raster layer.
C/P Paper 2 into selection.
Deselect.
Add you mask of choice.
Merge group.
Don't forget you copyright & Watermark

Wednesday, August 22, 2012

Killing Loneliness tut...

Supplies Used:
Dark Light kit by the amazing Manipulated by Magik. You can get it HERE.
Tube is a newly released band photo that was extracted for me by a friend. This tut will work with any tube though :P
Valentine Template #1 by Manipulated By Magik. You can find the info on where to get them on her blog HERE.
Eyecandy 4000 Gradient Glow & Glass
Font: Satisfaction.

Open up the template and delete the credit layer.
Select the background layer. We will be working our way from the bottom of the template up.
Delete the background layer.
Select the bottom right bar 1 layer. Selections, Select all. Then click float. Add a new raster layer.
Open up paper 28. Use your crop tool to crop the paper down to just one row of skulls.
C/P Paper 28 into selection.
Deselect.
Delete Bottom right bar 1 layer.
Dropshadow skull paper layer.
Select the bottom right bar 2 layer. Selections, Select all. Then click float. Add a new raster layer.
Paste Paper 28 into selection.
Deselect.
Delete Bottom right bar 2 layer.
Dropshadow skull paper layer.
Select the Top Left bar 1layer. Selections, Select all. Then click float. Add a new raster layer.
Paste Paper 28 into selection.
Deselect.
Delete Top Left Bar 1 layer.
Dropshadow skull paper layer.
Select the Top Left bar 2 layer. Selections, Select all. Then click float. Add a new raster layer.
Paste Paper 28 into selection.
Deselect.
Delete Top Left Bar 2 layer.
Dropshadow skull paper layer.
Select the bottom left circle layer.
Selections, Select all, Float.
Add a new raster layer.
C/P Paper 4 into selection.
Deselect.
Delete Bottom left circle layer. 
Select the Bottom left circle frame layer.
Adjust the Hue/Saturation to a blue color to match the rest of the tag. Dropshadow.
Select the Top right circle layer.
Selections, Select all, Float.
Add a new raster layer.
C/P Paper 4 into selection.
Deselect.
Delete Bottom top right circle layer. 
Select the Top left circle frame layer.
Adjust the Hue/Saturation to a blue color to match the rest of the tag. Dropshadow.
Select the Rectangle 1 layer. Adjust Hue/Saturation to a blue color that matches your tag. Dropshadow.
Select rectangle 2.
Go to selections, Select all, Float. Add a new raster layer.
C/P Paper 22 into selection.
Deselect.
Delete Rectangle 2.
Dropshadow Paper layer.
Select the heart background layer.
Selections, Select all, Float.
Add a new raster layer.
C/P Paper 12 into selection.
C/P your close up tube if you are gonna use one.
Go to selections, Invert, Delete.
Delete the original heart background layer.
Select the pixel words layer. 
Go to Adjust, Color Balance, Negative image.
Select the heart frame layer.
Go to Adjust, Color Balance, Negative image.
Select the Killing Loneliness Word Art layer.
Go to Adjust, Color Balance, Manual color correct.
Set the source to the color the word is, The target to the color you want to change it too.
Select the Word Art 1 layer.
Go to Adjust, Color Balance, Manual color correct.
Set the source to the color the word is, The target to the color you want to change it too.
C/P your main tube. Dropshadow.
Position tube under the word art layers.
move all 6 word art layers to the top, Keeping them stacked color on top, Then glow layer, Then shadow layer.
Merge together the wordart layers.
C/P Casket. Resize by  75%.
Image, Rotate, Free rotate 90 Degrees.
Use your deform tool to position the casket on an angle along the left side of the heart.
Using your eraser tool eraser the legs off the casket.
Dropshadow Casket.
C/P Ciggies. Resize by 30%. Dropshadow. Use your deform tool to position.
C/P Bottle. Resize by 40%. 
Adjust the hue/Saturation on the bottle to match your tag. Dropshadow. Position to the right of the ciggies.
C/P Tomb. Resize by 40%. Dropshadow. Duplicate. Position both tombs near the bottom center of the heart.
C/P Feather. Image, Mirror. Resize by 40%. Dropshadow. Position so the feather falls over the ciggie pack.
C/P Candle. Resize by 20%. Dropshadow. Duplicate. Position slightly left of the tip of the feather.
C/P Skull. Resize by 30%. Dropshadow. Position just over the right side of the candles.
C/P Wine. Resize by 20%. Dropshadow. Duplicate. Position glasses up the right side of the skull.
C/P Pressed Flower. 
Image, Rotate, Free Rotate 90 degrees.
Resize by 25%. Dropshadow.
Position pressed flower over the right side of the bottom of the tomb.
C/P Rose. Resize by 20%. Dropshadow. Position over the pressed flower.
C/P Razorblade. Resize by 20%. Dropshadow. Use your deform tool to position over just the bottom of the wineglasses.
 C/P Flower. Resize by 20%. Dropshadow. Position at the bottom of the glasses.
C/P Candle 2. Resize by 20%. Dropshadow. Duplicate.
Make sure your wor Art layers are at the top of your palette.
Add your font. 
Apply Eyecandy 4000 Gass of choice.
Add Eyecandy 4000 fat Gradient glow of 3. On tab 2 change the color to black for the first box and blue for the second.
Dropshadow font.
Don't forget to add your copyright and watermark!

Hell On Heels tut...

Supplies Used:
Tube is by Mario Chavez. I got this from CILM but they have closed. I am trying to find out where he is and when i do I will update this :)
Kit is Rawrcakes by Abstract Creations. Get it at PFD.
Mask of Choice
Eyecandy 4000 Gradient Glow & Glass
Alien Skin Eye Candy 5 Nature Fire
Fonts: Misfit 2 & Selfish

Open a new image size 500 by 500.
C/P E 39. Resize by 60%. 
Select the inside of your frame with the magic wand.
Selections, Modify, Expand by 3.
Add a new raster layer under the frame layer.
C/P Paper 8 into selection.
Add another new raster layer.
Go to Selections, Invert.
Apply Alien Skin Eye Candy 5 Nature Fire default but on the 2nd tab change to these settings....
Hit delete on your keyboard.
Deselect.
Change the opacity of the fire layer to about 70.
Dropshadow your frame layer.
C/P E 19. Resize by 75%.
Go to image, Rotate, Free Rotate 90 degrees.
Position over the left side of the frame.
Dropshadow Branch.
C/P E51. Resize by 30%.
Image, Rotate, Free rotate 90 Degrees.
Dropshadow. Position over the center of the branch.
C/P E75. Resize by 40%. Dropshadow. Position devil near the bottom left corner of the frame.
C/P E25. Resize by  60%. Use your deform tool to position on a slight angle. Dropshadow. Move these under your devil.
C/P E14. Resize by 25%. Use your deform tool to position on a slight angle over the bottom half of the devil. Dropshadow.
C/P E64. Resize by 40%. Dropshadow. Position to the right of the devil.
C/P E44. Resize by 30%. Dropshadow. Position over the bottom of the shoe.
Using the Misfit 2 font type out the word HELL.
Convert to raster layer.
Apply Eyecandy 4000 Glass of choice.
Add Eyecandy 4000 Gradient Glow fat of 3 with the following settings....
Dropshadow.
Using the Selfish Font type out On Heels.
Convert to raster layer.
Apply Eyecandy 4000 Glass of choice.
Use the same settings for the gradient glow but on tab 2 remove the yellow and change it to black.
Dropshadow.
Select your background layer.
Go to selections, Select all.
Add a new raster layer.
C/P Paper 7 into selection.
Deselect.
Add mask of choice.
Merge group.
C/P E 36. Resize by 75%. Dropshadow.
Duplicate stars & mirror.
Don't forget to add your copyright and watermark.

Tuesday, August 21, 2012

New Tutorial written by Magik

My girl Magik has done it again! Check out the beautiful tut she has written with my Zombie Heart Scrapkit.
You can buy this kit from PFD.
Here is her tut...

Results from my tuts & Scraps...

This first result is from Mickey with PSPing with friends. She did my Blue Music Mini tut.

Next is my Fallin' Plumerias tut by Dixie at PSPing with friends.
Here is Rebel Summer by Bonnie.
And finally this one is from my Guardian Angel tut.

Thank you all for these beautiful results!!

Friday, August 17, 2012

Sleepwalking In Autumn tut...(FTU)

Supplies Used:
Leaves are falling tube by Zindy. This is part of her Autumn pack which you can get HERE.
Sleepwalking Past Hope Freebie kit by Manipulated By Magik. Get it HERE.
Eyecandy 4000 Gradient Glow (Font Only)
Font: Feel Script

Opean a new image size 500 by 500.
C/P Frame 3. Resize by 65%.
Select the inside of the frame with your magic wand.
Selections, Modify, Expand by 3.
Add a new raster layer under the frame layer.
C/P Paper 1 into selection.
C/P your tube.
Selections, Invert, Delete.
Dropshadow tube.
Dropshadow frame.
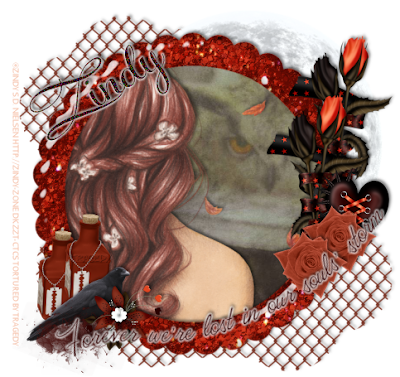
C/P Roses. Resize by 50%. Dropshadow. 
Duplicate Roses.
Position roses along the right side of the frame.
C/P Rose. Resize by 30%.
Dropshadow rose.
Duplicate rose. Position both at the bottom of the rose stems.
C/P Spiked Heart. Resize by 25%. Dropshadow. 
Position heart under the right side of the single roses.
C/P Bottle. Resize by 25%. Dropshadow.
Duplicate bottle.
Position bottles near the bottom left side of the frame.
C/P Crow. Resize by 20%. Dropshadow.
Position crow over the bottom of the bottles.
C/P Blood Splatter. Resize by 25%. Dropshadow. 
Duplicate Blood Splatter. Position both over the tail of the crow.
C/P Flower. Resize by 25%. Dropshadow.
Position flower near the chest of the crow.
C/P Word Art 1. Resize by 75%.
Use your deform tool to position the word art so it stretches from one cluster to the other.
Apply Gradient Glow of 3 in white.
Dropshadow word art.
Type out your font. 
Go to Adjust, Add/Remove Noise, Add noise.
Settings Random, 50, Monochrome unchecked.
Add Drop Shadow.
Add Gradient Glow of 3 in white.
Dropshadow.
Select your background layer.
C/P Moon. Move so that the moon sticks out over the upper right side of the frame.
Dropshadow moon.
C/P Wire. Resize by 75%.
Dropshadow. Position under the top left side of the frame.
Duplicate wire.
Image, Flip, Mirror.
Don't forget to add your copyright and watermark!

Native Butterfly tut...(FTU)

Supplies Used:
Raven 1 tube by Zindy. She is a part of the Witch pack that can be found  HERE.
Swag Alley Blues kit by my sis Manipulated By Magik. You can find this kit and all the goodies that go woth it HERE.
Eyecandy 4000 Gradient Glow
Font: Sheer Grace

Open a new image size 500 by 500.
C/P Glitter Scatter. Resize by  75%.
Dropshadow.
C/P Frame 2. Resize by 75%.
Select the inside of the frame.
Selections, Modify, Expand by 3.
Add a new raster layer under the frame layer.
C/P Paper 8 into selection.
Deselect.
Dropshadow frame.
C/P Sparkles.
Image, Rotate, Free rotate 90 degrees.
Resize by 75%.
Dropshadow.
Position sparkles over the left side of the frame.
C/P your tube. Dropshadow.
Use your eraser tool to remove any bits that hang over the bottom of the frame.
C/P Roses. Resize by 50%. Dropshadow.
Duplicate Roses.
Position both sets of roses over the left side of the frame.
C/P Spilled Pearls.
Resize by 40%.
Dropshadow Pearls.
Position pearls at the bottom of the roses.
C/P Butterfly 2. Resize by 40%.
Dropshadow.
Position over the spilled pearls.
Type out your font.
Add inner bevel of choice.
Apply Gradient Glow of 3 in white.
Dropshadow.
Don't forget to add your copyright & Watermark.

Thursday, August 16, 2012

Japanese Magic tut (FTU)

Supplies Used:
Japanese Witch tube By Zindy. This tube can be found in her new witch pack HERE.
A Magical Place FTU sampler by Gothic Inspirations. Get it HERE.
Eyecandy 4000 Gradient Glow (Font Only)
Font: Japanese Brush

Open a new image size 500 by 500.
C/P Tag Back. 
Resize by 70%. Dropshadow.
C/P Mesh. Resize by 50%. Dropshadow.
Duplicate mesh. Image, Flip. 
Bring the mesh layers together in the center.
Layers, Merge down.
Duplicate Mesh & Mirror.
C/P Frame 2.
Resize by 60%. 
Select the inside of the frame with you magic wand. 
Selections, Modify, Expand by 3.
Add a new raster layer under the frame layer.
C/P Paper 1 into selection.
Deselect.
Dropshadow frame.
C/P your tube.
Dropshadow.
C/P Bling Spill. Resize by 75%.
Image, Mirror. Dropshadow.
Position Bling Spill over the left side of the frame.
C/P Lantern. Resize by 25%. Dropshadow. 
Duplicate Latern.
Position lanterns hanging from the red mesh on the left side of the frame.
C/P Ribbon. Resize by 50%. Dropshadow.
Duplicate ribbon. Image, Flip.
Position both ribbons over the bottom part of the frame.
C/P Heart. Resize by 15%. Dropshadow. Use your deform tool to position on a slight angle.
Duplicate Heart. Image, Mirror. Position both hearts over the right side of the ribbon.
C/P Fireflies W Bottle. Resize by 50%. 
Position Fireflies to the far left of the ribbon.
C/P  Flower 2. Resize by 20%. Dropshadow.
Position at the bottom of the firefly jar.
C/P Vase. Resize by 20%. Dropshadow. 
Position so the bottom of the vase just covers the edge of the fireflies.
C/P Rose. Resize by 30%. Dropshadow.
Position under the vase.
Duplicate rose & mirror. Position under the vase.
Duplicate Flower 2. Position over the bottom of the vase.
C/P Flower 1. Resize by 15%. Dropshadow. 
Use your eraser tool to remove the stem of the flower.
Position over the top of the vase.
Type out your font.
Apply Inner bevel of choice.
Add Gradient Glow of 5.
Dropshadow font.
Don't forget to add your copyright & Watermark.

Catching Dreams tut...FTU

Supplies Used:
Raven II tube by Zindy. This tube is part of the witch pack that can be found HERE.
Moon Rises FTU Sampler by Gothic Inspirations. Get it from her blog HERE.
Font: AL Meaningful

Ok so you know how sometimes less is more? This is one of those times. This is a super easy tut but the fact of the matter is this is what I thought best suited the tube. Hope you enjoy it!

Open a new image size 500 by 500.
C/P Frame 3.
Resize frame by 60%.
Select the inside of the frame with your magic wand.
Selections, Modify, Expand by 3.
Add a new raster layer under the frame layer.
C/P Paper 4 into selection.
Deselect.
Dropshadow frame.
C/P Cloud. 
Resize by 50%.
Dropshadow cloud.
Position at the top of your frame.
C/P Half Moon.
Resize by 30%. 
Dropshadow moon.
Position over the top right side of the frame.
C/P Soft Spill.
Image, Rotate, Free Rotate 90 degrees.
Resize soft spill by 40%.
Dropshadow Soft Spill.
Position at the bottom of the frame.
C/P Sparkles. 
Resize Sparkles by 50%.
Position starting near the middle of the bottom of the frame.
Dropshadow Sparkles.
C/P Pattern.
Resize Pattern by 40%.
Dropshadow Pattern.
Duplicate pattern & Mirror.
Position both pattern layers over the bottom of the frame.
C/P your tube.
Dropshadow.
C/P Dream catcher. (This is a layer from the tube not in the kit. If you don't have the dream catcher you could always substitute the Word art, Flower, or even the winged heart.)
Resize Dream Catcher by 75%.
Dropshadow Dream Catcher.
Position over the top curve of the moon.
Apply your font.
Add Inner bevel of choice.
Change the opacity of your font to around 80. (I did not use a dropshadow on the font.)
Don't forget your copyright & Watermark.

Wednesday, August 15, 2012

Wine & Strawberries tut...(FTU)

Supplies Used:
Mask of Choice
Tube by Zindy called Letting Go. Get it HERE.
Kit from A Taggers Scrap called Strawberry Wine. Get it HERE.
Eyecandy 4000 Gradient Glow (Font Only)
Font: Love

Open a new image size 500 by 500.
C/P Frame 2.
Image, Rotate, Free Rotate 90 Degrees.
Resize frame by 75%.
Dropshadow Frame.
C/P Greenery.
Image, mirror.
Duplicate Greenery.
Change the layer property on the duplicate to multiply.
Dropshadow original greenery.
C/P Deco 2.
Resize Deco 2 by 50%. Dropshadow.
Position over the top left corner of the frame.
Duplicate Deco & Flip.
Duplicate Deco & Mirror.
C/P your tube. Dropshadow.
C/P Stumps.
Resize stumps by 50%. Dropshadow.
C/P Flowers.
Resize flowers by 30%. Dropshadow. 
Position flowers under the top of the stump.
C/P Strawberry 2.
Resize baskets by  50%. Dropshadow.
Position over the left bottom corner of the frame.
C/P Wine Bottle.
Resize Wine Bottle by 30%. Dropshadow.
Position bottle in the center of the baskets.
C/P Wine Bottle 2. Resize by 30%. Dropshadow. 
Position over the original Wine Bottle.
C/P Bird. Resize by 30%. Dropshadow.
Position bird at the bottom of the wine bottles.
C/P Strawberry 5. Resize by 50%. Dropshadow.
Position strawberries over the right edge of the baskets.
Type out your font.
Apply inner bevel of choice.
Add Gradient Glow of 3.
Select your background layer.
C/P Paper 2.
Apply mask of choice & Merge group.
Don't forget to add your copyright and watermark!

Leaves of Lavender tut...(FTU)

Supplies Used:
Autumn Magic tube by Zindy. Get it HERE.
Lavender Sunrise Sampler by Gothic Inspirations. Get it HERE.
Eyecandy 4000 Gradient Glow
Font: Saginaw.

Open a new image size 500 by 500.
C/P Tagback Cluster. Resize by 70%. Dropshadow.
C/P Frame 1. Resize by  65%. Dropshadow.
Use your deform tool to position the frame on an angle with the top corner being the point farthest right.
C/P your tube. Dropshadow. (If using a different tube you may want to add a paper in the open part of the frame first.)
C/P Fencing. 
Resize by 50%.
Dropshadow Fence.
Line the bottom of the fence up with the bottom right corner of the frame.
C/P Water. 
Resize by 50%.
Duplicate water. 
Position both sets of bubbles over the left side of the fence going just to the right of the bottom point of the tagback.
C/P Brushed Flowers.
Resize flowers by 50%. Dropshadow.
Position flowers over the fencing.
C/P Light. 
Resize light by 30%. Dropshadow.
Duplicate Light.
Position one lantern slightly lover than the other to the right of the flowers on the tagback.
C/P Butterflys 1.
Resize butterflies by 30%.
Dropshadow Butterflies.
Using your selection tool select only the green butterfly.
Hit delete on your keyboard.
Deselect.
Using your deform tool position the butterfly on a slight angle at the top of one of the lanterns.
Duplicate Butterfly.
Go to image, Mirror.
Position butterfly over the original.
C/P Bird 2. Resize by 30%. Dropshadow. 
Position at the bottom left corner of the frame.
Type out your font.
Apply inner bevel of choice.
Add Gradient Glow of 3 in white.
Dropshadow of choice.
Don't forget to add your copyright & Watermark!