Monday, March 9, 2015

Diaboli tut....

Supplies Used:
Ville Valo tube by Arthur Crowe. This tube is exclusive to members of HIM Addicts.
Stigmata Diaboli kit from Manipulated By Magik. This is also a forum exclusive at HIM Addicts.
Eyecandy 4000 Gradient Glow
Alien Skin Eye candy 5: Impact, Backlight
Mask of choice
Fonts: Ministry and Minister No.1

Open a new image size 500 by 500.
Using your select tool draw out a box 3/4 the size of your tag.
Apply Backlight filter using the outline rainbow setting...The colors tab should look similar to this...
Deselect.
Apply mask of choice.
Duplicate a few times until the colors shows through...(I did mine 4 times)
C/P Tulle.
Dropshadow.
C/P Frame 6.
Resize by 75%.
Select the inside of each frame.
Selections, Modify, expand by 3.
Add a new raster layer under the frame layer.
Open Paper 7.
C/P Paper into selection.
Deselect.
Dropshadow frame layer.
C/P Notes.
Position over the bottom left of the frames.
If desired use your eraser tool on the part of the notes that goes off canvas.
Dropshadow notes.
C/P Sparkle.
Image, Flip.
Position as desired over notes.
C/P Headstone.
Resize by 60%.
Dropshadow.
Position over bottom right corner of frames.
C/P Rose.
Resize by 30%.
Dropshadow.
Position on top of the headstone.
C/P Goblet.
Resize by 40%.
Dropshadow.
C/P Spider.
Resize by 15%.
Dropshadow.
Use your deform tool to position over the spider already on the glass.
Duplicate goblet and position slightly right of the original.
C/P Candle.
Resize by 30%.
Dropshadow.
Lower the opacity to about 90.
Duplicate candle.
Position the candles over the rim of the goblets.
C/P Heartagram deco.
Resize by 60%.
Dropshadow.
Position at the bottom of the frame so the heartagram is between the middle and the third frame.
C/P tools.
Resize by 40%.
Dropshadow.
Position to the top right of the heartagram.
C/P Cross.
Resize by 30%.
Use your deform tool to position on a slight angle to the bottom right of the goblets.
Adjust, Sharpness, Sharpen.
Dropshadow cross.
C/P Skulls.
Resize by 30%.
Dropshadow.
Position at the bottom of the cross.
C/P Spider.
Resize by 15%.
Dropshadow.
Position at the top of one skull.
Type out "I'm Your" using the Ministry font in color #6b446e.
Convert to raster layer.
Apply inner bevel of choice.
Add fat black gradient glow of 3.
Add Black Dropshadow.
Repeat Dropshadow but change the color to #baa6b4.
Using the Ministry font in black Type out "Christ".
Use the text box to stretch the word to fit your tag.
Convert to raster layer.
Apply inner bevel of choice.
Add Gradient glow of 10 in color #6b446e.
Add black dropshadow.
Type out "and I want you" using the Ministry font in color #6b446e.
Convert to raster layer.
Apply inner bevel of choice.
Add fat black gradient glow of 3.
Add Black Dropshadow.
Repeat Dropshadow but change the color to #baa6b4.
Type out your name using the Minister No.1 font  in black.
Convert to raster layer.
Apply inner bevel of choice.
Add Gradient glow of 3 in color #6b446e.
Add black drop shadow.
Don't forget to add your copyright & Watermark.


Wednesday, February 25, 2015

Crafting The Dead tut...(FTU)

Supplies Used:
Dead Style tube from Tunchy Art. Get it at Mystical Scraps.
Witchcraft Sampler from Gothic Inspirations. Get it HERE.
Eyecandy 4000 Gradient Glow (Font Only)
Font: Misfit 2

Open a new image size 500 by 500.
C/P Mesh.
Resize by 65%.
Dropshadow.
C/P Falling Leaves.
Resize by 30%.
Dropshadow.
Duplicate several times and position around the outside edges of the mesh.
C/P Frame 2.
Resize by 60%.
Select the inside of the frame using the magic wand tool.
Selections, Modify, Expand by 4.
Add a new raster layer under the frame layer.
C/P Paper 2 into selection.
Deselect.
C/P Moon.
Resize by  20%.
Image, Mirror.
Position near the upper right of your paper.
Change the layer property to hard light.
C/P Tree.
Resize by 40%.
Position over the upper left side of the paper.
Change the layer property to overlay.
Duplicate tree layer.
Dropshadow original tree layer.
C/P House.
Resize by 40%.
Dropshadow.
Position under the left edge of the frame.
C/P Lantern.
Resize by 40%.
Dropshadow.
Position over the right side of the house.
C/P Fog.
Resize by 40%.
Change the layer opacity to around60.
Position near the top of the paper layer.
(If needed use your eraser tool to remove anything outside of the frame layer.)
 C/P Magic.
Resize by 20%.
Position over the moon.
C/P Bats.
Resize by 20%.
Dropshadow.
Position ove rhte top of the paper layer.
C/P Foliage.
Resize by 40%.
Dropshadow.
Position under the bottom edge of the frame.
Dropshadow frame layer.
C/P Leaves 3.
Resize by 30%.
Dropshadow.
Duplicate a few times and position along the bottom of the frame.
C/P Cross.
Resize by 30%.
Dropshadow.
Duplicate cross.
Position crosses over the bottom right of the frame.
C/P Candle.
Resize by 20%.
Dropshadow.
Position to the bottom right of the crosses.
C/P Skull with rose.
Resize by 20%.
Position at the bottom of the crosses.
Duplicate skull with rose.
Change the layer property on the top layer to multiply.
Dropshadow original skull layer.
C/P your tube.
Dropshadow.
Position over the left side of the frame.
Type out your font.
Apply inner bevel of choice.
Add eyecandy 4000 gradient glow of 5 in a contrasting color.
Dropshadow.
Don't forget your copyright and watermark.


Monday, February 23, 2015

Victorianna tut (FTU)

Supplies Used:
Victoria Vampire tube from Celinart Pinup. Get it HERE.
Anna kit from Manipulated By Magik. Get it HERE.
Eyecandy 4000 Gradient Glow (Font Only)
Font: Yolanda Princess

Open a new image size 500 by 500.
C/P Frame 1.
Resize by 85%.
Using your lasso tool select all the way around the inside edges of the frame.
Add a new raster layer under the frame layer.
C/P Paper 5 into selection.
Add another new raster layer.
C/P Paper 4 into selection.
Deselect.
Change the layer property on the top paper to Color (l).
Duplicate frame layer.
Use your lasso tool to select all but the bottom of the frame.
Delete selection.
Deselect.
Dropshadow original frame layer.
C/P Casket.
Image, Mirror.
Resize by 60%.
Dropshadow.
Position under the top frame layer in the layer palette.
C/P Sparkles.
Resize by 60%.
Image, rotate, free rotate 90 degrees.
Position over the casket.
Dropshadow.
C/P Headstone.
Resize by 20%.
Dropshadow.
Position near the bottom middle of the casket.
C/P candle.
Resize by 40%.
Dropshadow.
Duplicate candle.
Position candles near the bottom right of the casket.
C/P Rose 1.
Image, Mirror.
Resize by 40%.
Dropshadow.
Position near the bottom of the candles.
C/P Skull.
Resize by 40%.
Posiiton over the bottom of the rose and candles.
Duplicate skull.
Change the layer property to Multiply.
C/P Spider.
Image, Flip.
Resize by 20%. 
Dropshadow.
Position at the bottom of the skull.
C/P your tube.
Dropshadow.
Position over the left side of the frame.
C/P Glitter Splatter.
Resize by 60%.
Dropshadow.
Type out your font.
Apply inner bevel of choice.
Add gradient glow of 3 in black.
Dropshadow.
Duplicate and mirror.
Merge Layer down.
Position under one side of the frame.
Duplicate and mirror.
Don't forget your copyright & watermark.


Sunday, February 15, 2015

Wild For Him tut...

Supplies Used:
Tube by The Hunter and Dirty Rocker Boy kit from Manipulated By Magik are both forum exclusive earnables. Join in the HIM fun at HIM Addicts.
Template 50 from Punky Butts Tutorials.
Eeyecandy 4000 Gradient Glow & HSB Noise.
Font: Fires Of Ysgard

Open the template and delete the copyright and background layers.
Dropshadow starburst right and left layers.
Select the green square layer.
Selections, Select all, Float.
Modify, Expand by 1.
C/P Paper 11 into selection.
Selections, Select none.
Move the Green frame layer above your new paper layer.
Click the paper layer in your layer palette.
Selections, Select all.
On the frame layer hit delete. This should leave just a small thin frame.
Deselect.
Go to adjust, Color balance, manual color correct.
Click manual color.
Select the color from your template as the source and your desired color as the target.
Dropshadow your new frame layer.
Select the pink square layer.
Selections, Select all, Float.
Modify, Expand by 1.
C/P Paper 15 into selection.
Selections, Select none.
Move the pink frame layer above your new paper layer.
Click the paper layer in your layer palette.
Selections, Select all.
On the frame layer hit delete. This should leave just a small thin frame.
Deselect.
Go to adjust, Color balance, manual color correct.
Click manual color.
Select the color from your template as the source and your desired color as the target.
Dropshadow your new frame layer. 
Using your magic wand tool select the  small squares at the top and bottom of the film strip.
Selections, Modify, Expand by 1.
C/P Paper 4 into selection.
Deselect.
click the center of the frame using your magic wand.
C/P Paper 5 into selection.
Add a new rater layer.
C/P paper 7 into selection.
Deselect.
Change the layer property to Luminance (L).
Select the pbs frame again.
Using the manual color correct tool again change the pink squares of the frame to a color to compliment your tag.
Click on the star layer right.
Manual color correct to your desired color.
Apply Eyecandy 4000 HSB noise.
Selections, Select all, Float.
Modify, Expand by 3.
Add a new raster layer and flood fill with desire color for star frame.
Hit delete.
Deselect.
Adjust, Add/Remove Noise.
Add noise Random, 100, Monochrome checked.
Dropshadow star frame layer.
Click on the star layer left.
Manual color correct to your desired color.
Apply Eyecandy 4000 HSB noise.
Selections, Select all, Float.
Modify, Expand by 3.
Add a new raster layer and flood fill with desire color for star frame.
Hit delete.
Deselect.
Adjust, Add/Remove Noise.
Add noise Random, 100, Monochrome checked.
Dropshadow star frame layer. 
C/P Star Chain.
Image, Rotate right 90 degrees.
Resize by  75%.
Dropshadow.
Position near the bottom of the film strip frame.
C/P your tube.
Dropshadow.
Position over the left side of the tag.
Click on the word art glow layer.
Use your manual color correct tool to change the color of the glow. Don't worry about it changing the color of the word art cause the black layer is over it ;)
Dropshadow black wordart layer.
C/P Smokes.
Image, Rotate 90 degrees.
Resize by 50%. 
Dropshadow.
Position near the inside bottom right corner of the film strip frame.
C/P Deadly Finger.
Resize by 75%.
Dropshadow.
Position over the right side of the film strip frame.
C/P Booze.
Resize by 60%.
Image, Mirror.
Dropshadow.
Position over the bottom of the other elements.
Type out your font.
Apply inner bevel of choice.
Add Gradient Glow of 3, Second tab make sure you have 2 different color boxes.
Dropshadow.
Resize as desired.
Don't forget your copyright and watermark.

Pleasure & Pain tut...(FTU)

What I Used:
Chained To The Pain kit from Gothic Inspirations. Get it from her blog HERE.
Miki tube from Celinart Pinup. Get it at her store HERE.
Eyecandy 4000 Gradient Glow (Font Only)
Font: Selfish

Open a new image size 500 by 500.
C/P Mesh.
Resize by 65%.
Dropshadow.
C/P Spill.
Dropshadow.
C/P Window Goth 2.
Resize by 65%.
C/P Leaves.
Resize by  75%.
Dropshadow.
Move under the window layer.
Use your deform tool to position under the left side of the window.
Duplicate and mirror.
Using your magic wand select the inside of the window.
Add a new raster layer.
C/P Paper 13 into selection.
Deselect.
Move under window layer.
Dropshadow window.
C/P Cage 1.
Resize by 40%.
Dropshadow.
Position under the top of the window.
C/P Poser 2.
Image, mirror.
Resize by 20%.
Dropshadow.
Position over the middle of the cage.
C/P Lights.
Resize by 40%.
Dropshadow.
Position over the top of the cage.
Use your eraser tool to remove any excess outside of the frame.
C/P Teaser.
Move above the window layer.
Resize by 75%.
Use your deform tool to position starting near the bottom of the frame.
Dropshadow.
C/P Cadle 1.
Resize by 30%.
Dropshadow.
Duplicate candle.
Position candles near the bottom left corner of the window.
C/P Pillows.
Resize by 30%.
Dropshadow.
Position over the bottom of the teaser and candles.
C/P Collar.
Resize by 30%.
Position near the center of the bottom pillows.
Use your eraser tool to remove what would be the back of the collar.
Dropshadow.
C/P Cuffs Bondage.
Resize by 30%.
Dropshadow.
Position over the right of the top pillow.
C/P Paddle.
Resize by 30%.
Use your deform tool to position near the bottom right of the pillows.
Dropshadow.
C/P Wine.
Resize by 30%.
Dropshadow.
Position to the left side of the paddle.
C/P Lipstick.
Resize by 30%.
Use your deform tool to position to the bottom right of the bottle.
Dropshadow.
C/P your tube.
Dropshadow.
Type out your font.
Apply inner bevel of choice.
Add black gradient glow of 3.
Dropshadow.
Don't forget to add your copyright and watermark.


Monday, February 9, 2015

Reaper's Widow tut...

Supplies Used:
Anna tube by Celinart Pinup. Get it HERE.
Follow The Reaper kit from Manipulated by Magik. Get it at Mystical Scraps.
Eyecandy 4000 gradient Glow (Font only)
Mask Of Choice
Font: Zombified

Open a new image size 500 by 500.
Selections, Select all.
C/P Paper 17 into selection.
Deselect.
Apply mask of choice.
Layers, Merge group.
C/P Sparkles.
Position over the top of the mask.
Image, Duplicate.
Image, Flip.
Image, Mirror.
C/P Arch.
Dropshadow.
Position to the left side of the tag.
C/P Catafalque.
Resize by  75%.
Dropshadow.
Use your eraser tool to remove any part of the arch that shows inside the catafalque.
C/P Roses.
Resize by 75%.
Dropshadow.
Position over the left side of the catafalque.
C/P Gravestone.
Resize by 75%.
Dropshadow.
Position just over the bottom of the rose on the right.
C/P Flowers.
Resize by 75%.
Dropshadow.
Position over the left side of the gravestone.
C/P Grave.
Resize by 75%.
Dropshadow.
Position at the bottom left of the Catafalque.
If needed use your eraser tool on the flowers layer to remove the bottom of the bow.
C/P Thorned Heart.
Resize by 25%.
Dropshadow.
Position on top of the headstone.
C/P your tube.
Dropshadow.
Position over the right side of the catafalque.
Type out your font at the bottom of the grave.
Apply inner bevel of choice.
Add eyecandy gradient glow of 3 in black.
Dropshadow.
Don't forget to add your copyright and watermark.


Lover Letters tut...(FTU)

Supplies Used:
Joanna Ange tube from Celinart Pinup. Get it HERE,
Valentines for Alexis kit from Manipulated By Magik. Get it HERE.
Font: Scrap Cursive
Mask Of Choice.

Open a new image size 500 by 500.
Selections, Select all.
C/P Paper 6 into selection.
Deselect.
Merge group.
C/P Journal.
Image, Rotate, Free rotate 15 degrees right all layers unchecked.
Dropshadow.
C/P Rose Deco.
Resize by 75%.
Image, Flip.
Image, Rotate, Free rotate 15 degrees right all layers unchecked.
Position along the top of the journal.
Dropshadow rose deco.
C/P Rose.
Resize by 60%.
Use your eraser tool to remove the stem of the rose over the pen.
Dropshadow.
C/P Sparkles.
Resize by 75%.
Dropshadow.
Position over the right side of the journal.
C/P Falling Hearts.
Resize by 50%.
Dropshadow.
Position near the bottom right of the journal.
C/P Letter.
Resize by 50%.
Dropshadow.
Position near the bottom center of the RIGHT side of the journal.
C/P Photo.
Resize by 30%.
Image, Rotate, Free rotate 15 degrees right all layers unchecked.
Dropshadow.
Duplicate photo.
Image, Mirror.
Position under the right of the original pic layer.
C/P your tube.
Dropshadow.
Tye out your font.
Convert to raster layer.
Apply inner bevel of choice.
Add dropshadow.
Don't forget your copyright and watermark!


Wednesday, February 4, 2015

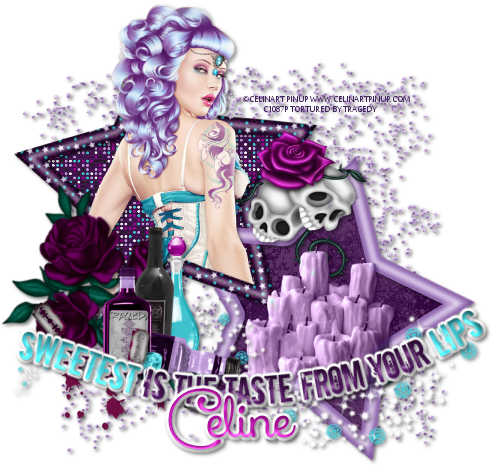
Sweetest Lips tut...

Supplies Used:
Elsa Tube from Celinart Pinup. Get it HERE.
Razorblade Kiss kit from Manipualted by Magik. Get it at Mystical Scraps.
Eyecandy 4000 Gradient Glow
Font: Xiomara

Open a new image size 500 by 500.
C/P Glitter scatter.
resize by 75%.
Dropshadow.
C/P Frame 4.
Resize by 75%.
Using your magic wand select the inside of the right frame.
Selections, Modify, Expand by 5.
Add a new raster layer under the frame layer.
C/P Paper 5 into selection.
Deselect.
Click your frame layer again.
Using your magic wand select the top left frame and any remaining empty spaces.
Selections, Modify, expand by 5.
Click on your paper layer.
C/P Paper 17 into selection.
deselect.
C/P your tube.
Dropshadow.
Position tube as desired.
Duplicate the frame layer and move over your tube.
Use your eraser tool to remove any parts of the frame you do not want on the tube.
Erase the bottom of the tube that is showing under the frame.
Dropshadow original frame layer.
C/P Skulls 1.
Resize by 40%.
Dropshadow.
Position over the gap in the center of the frame.
C/P candles.
Resize by 40%.
Dropshadow.
Position over the bottom frame.
Change the layer property to Luminance (l).
C/P Sparkles and heartagrams.
Resize by 75%.
Dropshadow.
Use your deform tool to position as desired at the bottom of the frame.
C/P Roses 2.
Resize by 65%.
Dropshadow.
Use your deform tool to position over the bottom left of the frame.
C/P Liquor.
Resize by 40%. Dropshadow.
Position to the right of the rose blossoms.
C/P Blades and blood.
Resize by 40%.
Dropshadow.
Image,flip.
Position near the bottom of the bottles.
C/P Word Art 4.
Resize by 75%.
Apply inner bevel of choice.
Dropshadow.
Add eyecandy 4000 fat gradient glow of 3.
Dropshadow.
Position at the bottom of the frame.
Type out your font.
Apply inner bevel of choice.
Dropshadow.
Add eyecandy 4000 fat gradient glow of 3.
Dropshadow.
Position at the bottom of the frame.
Don't forget to add your copyrights and watermark :P
 

Tuesday, February 3, 2015

Rockin Weekend tut

Supplies Used:
Vikki tube by Celinart Pinup. Get it Here.
Hearts At War kit from Manipulated By Magik. Get it at Mystical Scraps.
Eyecandy 4000 Gradient Glow 
Fonts: Xiomara script and the quiet scream.
 
Open a new image size 500 by 500.
C/P Frame 1.
Resize by  75%.
Select the inside of the frame using you magic wand.
Selections, modify, Expand by 20.
Add a new raster layer and move under your frame layer.
C/P Paper 17 into selection. 
Deselect.
C/P Light Effect.
Position under the bottom right corner of the frame.
Using the Xiomara font type out the "Have a" and "Weekend!"
Convert to raster layer.
Add inner bevel of choice.
Dropshadow.
Add fat Gradient Glow of 3.
Dropshadow.
Using the quiet scream font type out rockin' in lower case.
Convert to raster layer.
Apply white drop shadow.
Add fat Gradient glow of 3...tab 2 should look like this...
 Apply black drop shadow.
Dropshadow frame layer.
C/P Skulls and rose.
Resize by 30%.
Dropshadow.
Position over top right corner of the frame.
Duplicate and mirror.
C/P Speaker.
Image, Mirror.
Resize by 60%.
Dropshadow.
Position just outside of the bottom right side of the frame.
C/P Rock Chick.
Image, mirror.
Resize by 50%. 
Dropshadow.
Position just left of the speaker.
C/P Ticket.
Resize by 25%.
Use your deform tool to position on a slight angle over the bottom right foot of the rock chick.
Duplicate ticket.
Use your deform tool to position just over the bottom ticket.
Adjust sharpness, sharpen.
Dropshadow both ticket layers.
C/P Guitar 1.
Resize by 50%.
Image, Mirror.
Dropshadow.
Position over the left foot of the rock girl.
C/P your tube over the left of the frame.
Dropshadow.
Apply tour name using the quiet scream font in lower case letters.
Add white drop shadow.
Repeat gradient Glow from before.
Add dropshadow in black.
Don't forget to add your copyright & Watermark!